thankQ Help
In the Contact Portal Interface you may optionally add a Pledges widget to allow a user to view any pledges that they have already made. To set this up please follow the steps below:
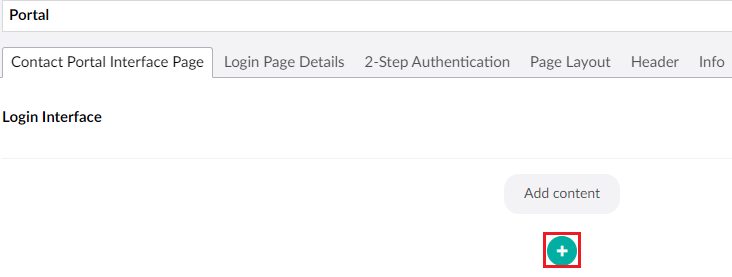
1. Open the Portal Page and click the + icon:
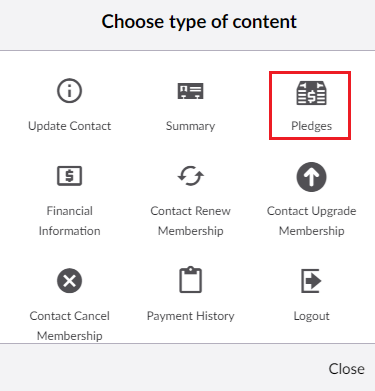
2. Select the Pledges icon to add a Pledges widget:
3. Add a label for this menu item as well as an Icon.
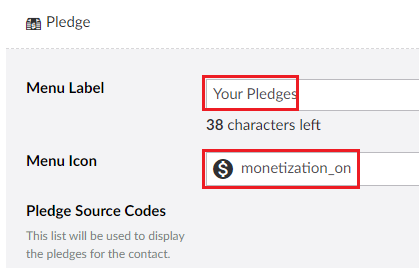
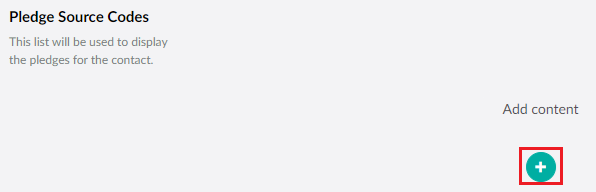
4. Add a Pledge Source Code - only pledges with the Source Codes you have listed here will be displayed to the end user.
In addition the Pledge that the user has must meet the following criteria in order to be displayed:
- Pledge is Active.
- Pledge is not for a Membership, Event, Tour, Raffle, Sponsorship or other non- donation payments.
- Pledge's End Date is in the future.
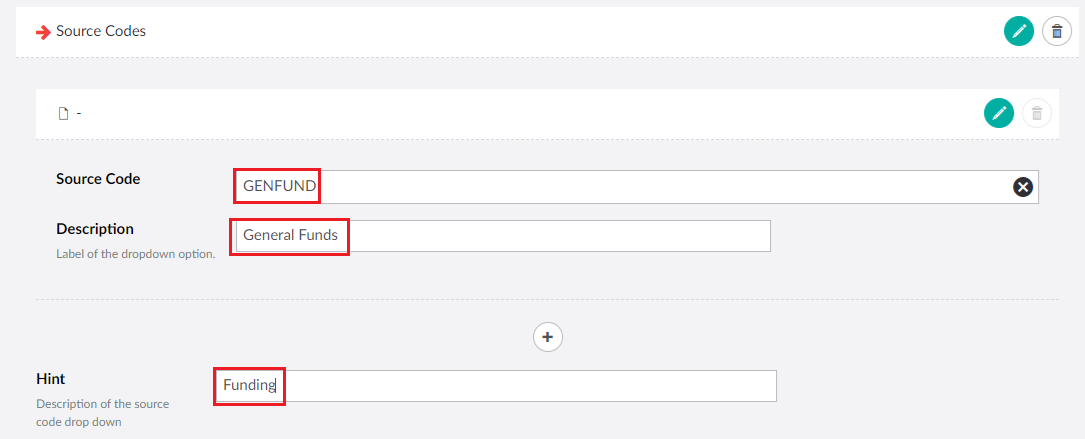
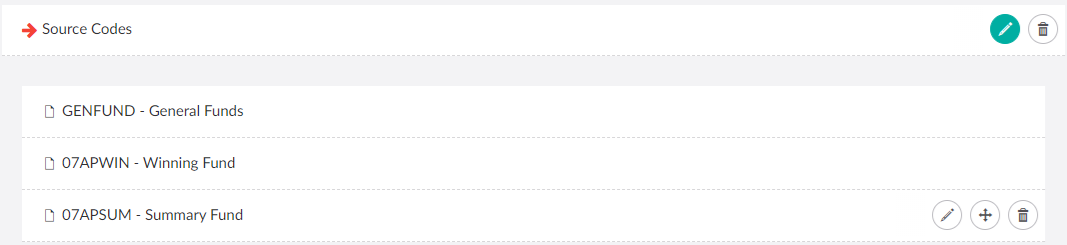
| 5. | Add the Source Code, the Description which is displayed to the end user and optionally a hint as well for the Dropdown form. Add as many Source Codes as you want: |
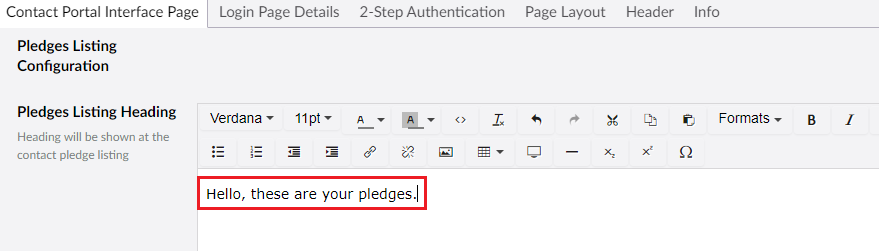
6. You can add text to the Pledges Listing Heading to describe the pledges that will be seen by the contact:
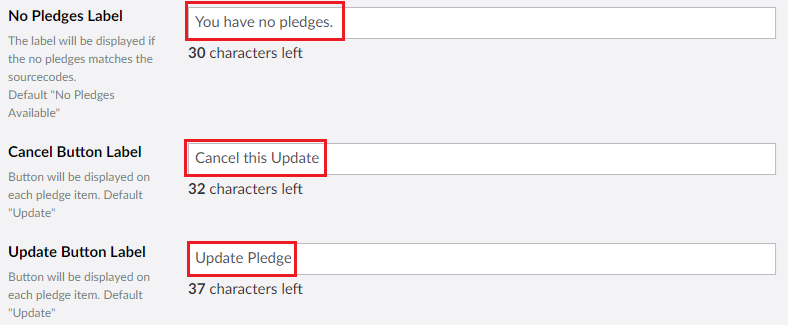
7. You can change the labels that will be displayed for No Pledges as well as updating or canceling an update of a pledge:
8. You may also set the maximum number of pledges that are displayed on a single page (default is 3):

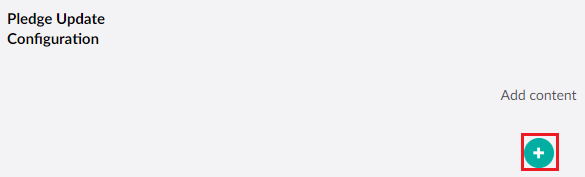
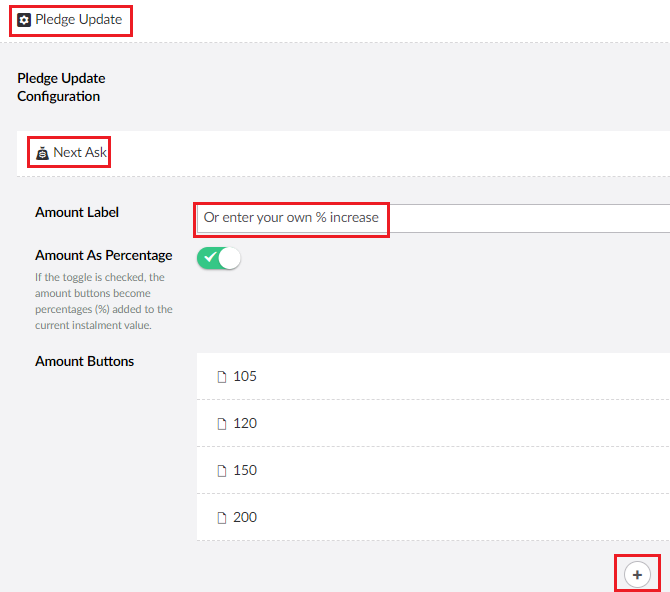
| 9. | If the user is permitted to update their pledges you may decide what fields they may update via Pledge Update Configuration. Add this using the + Icon below: |
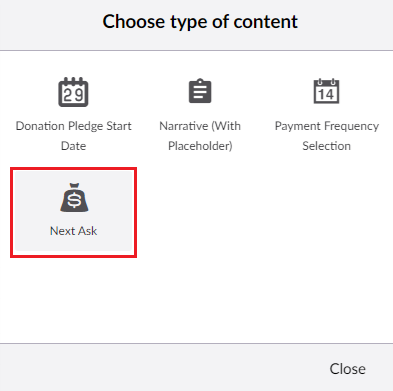
10. Once you have added this widget you will then need to select + again to add the Pledge Fields:
11. The first field to add will be the Next Ask:
| 12. | In the Next Ask widget you can add Donation Amounts either as a percentage or a fixed amount. |
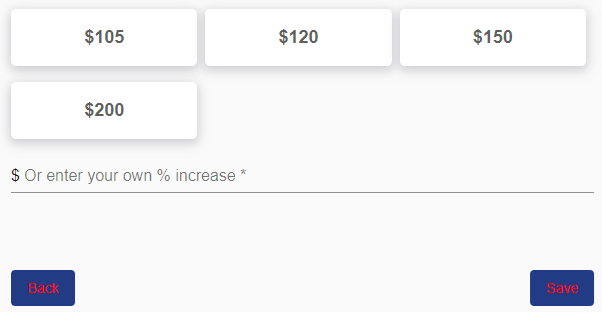
| In the case of Amount as Percentage being unchecked the pledge amount suggested to a user will be the values that you enter in Amount Buttons and it will completely ignore the current amount that the user is donating. |
| In the case of Amount as Percentage being checked the pledge amount suggested will be a percentage of the existing amount that is being pledged. For example if a user that is donating $100 per month then the donations suggestions will be a percentage of that amount. |
A $100 Regular Donation will give the following suggestions on the end user's page from the example provided above:
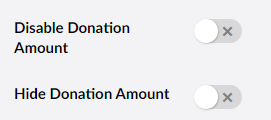
13. You can also Disable/Hide the Donation Amount:
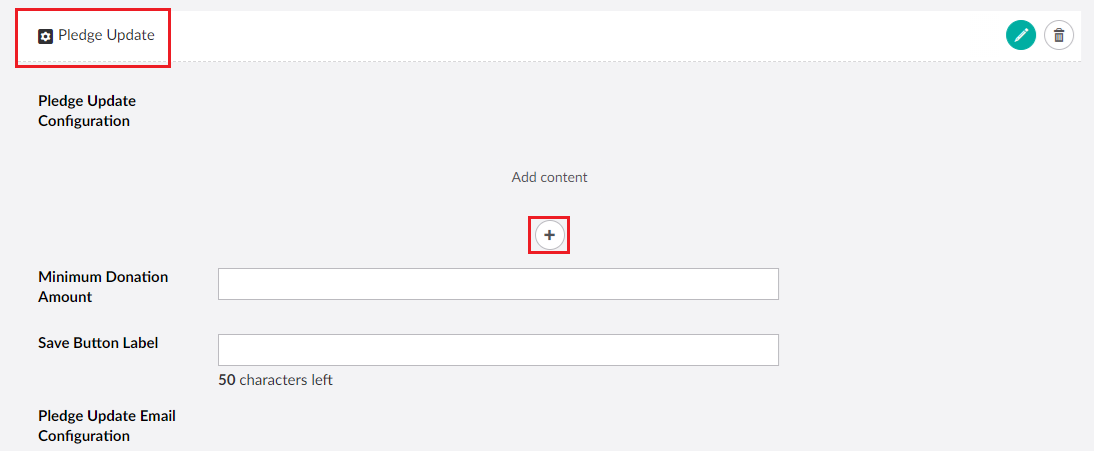
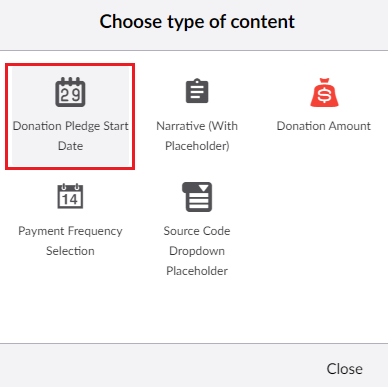
| 14. | You can now add additional, optional fields that the contact can change with their pledge. Close Donation Amount and use the + icon to select Donation Pledge Start Date if you want users to be able to change this. If you don't want this skip steps 14 to 15: |
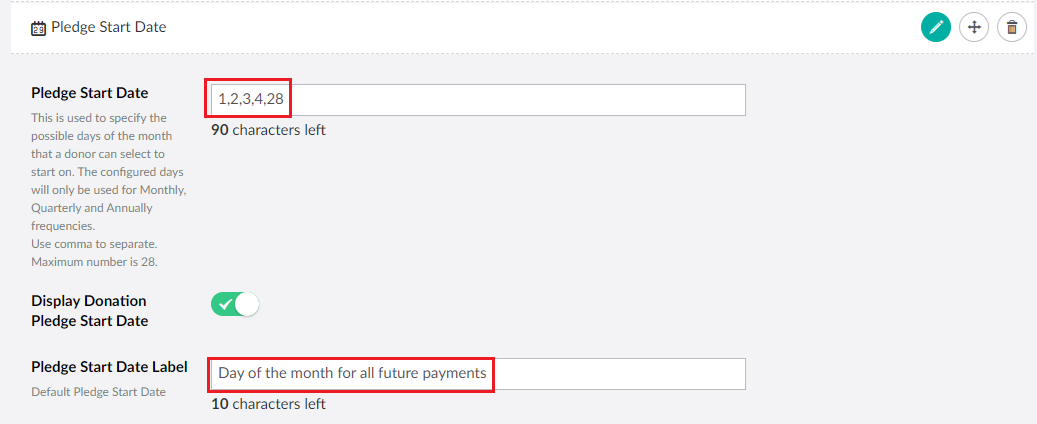
| 15. | Enter the days of the month you want users to be able to select. Users will only be able to pick these days. In the example below they can only start a pledge on the 1st, 2nd, 3rd, 4th and 28th day of the month. You may also change the label for the Pledge Start Date as well: |
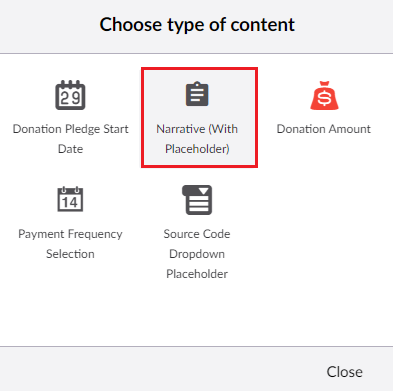
16. If applicable, use the + icon to select Narrative (with Placeholder). If you don't want this skip steps 16 to 17:
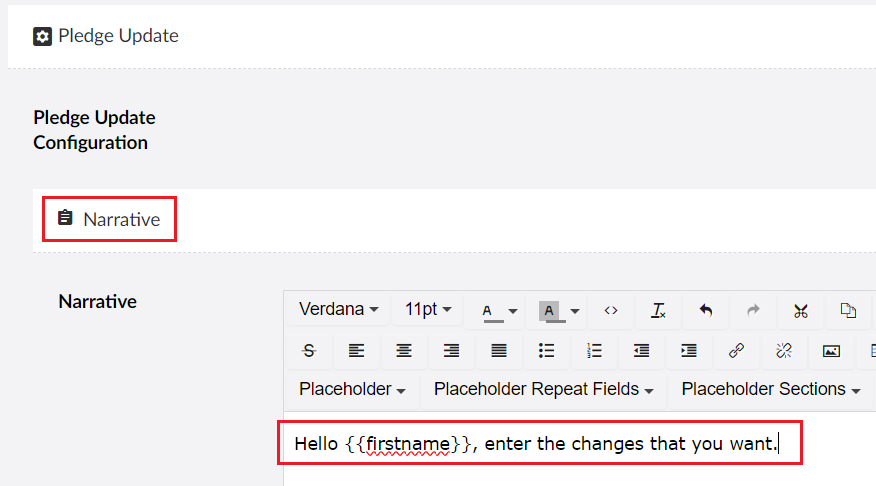
17. Enter a narrative to be displayed above these Pledge Fields:
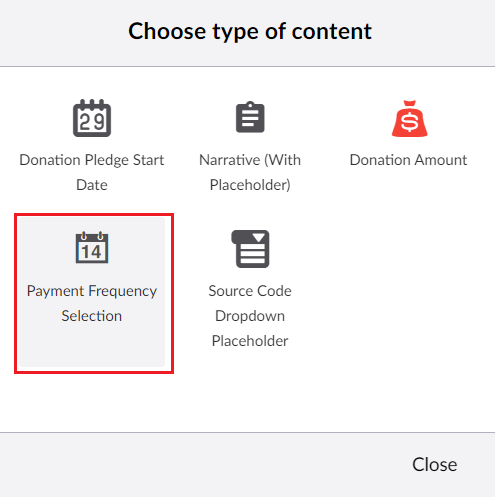
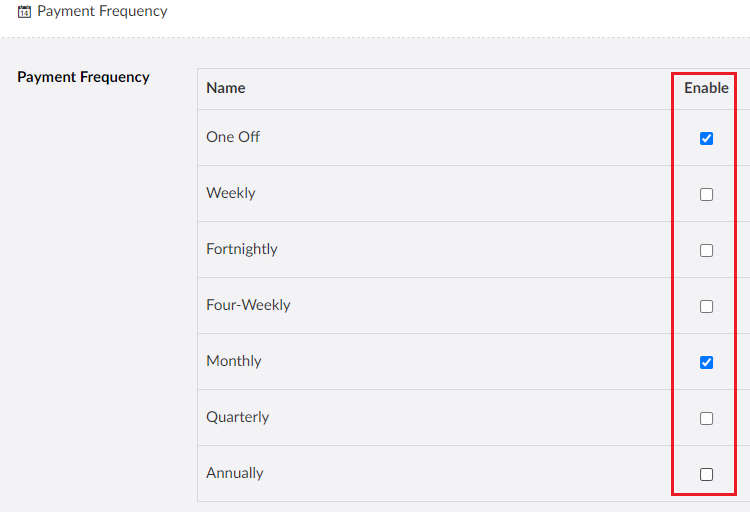
18. If applicable, use the + icon to select Payment Frequency Selection. If you don't want this skip steps 18 to 19:
19. Tick or untick the Payment Frequencies the user is permitted to select for the Pledge:
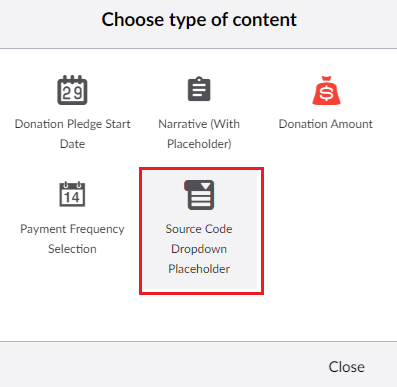
20. If applicable, use the + icon to select Source Code Dropdown Placeholder. If you don't want this skip steps 20 to 21:
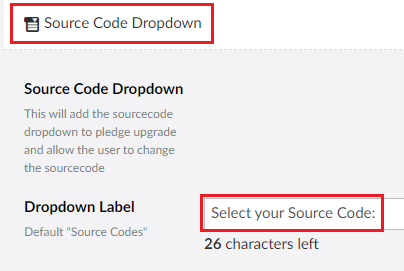
| 21. | You may also change the label of the dropdown, otherwise you do not need to make any further changes for the Source Code Dropdown to appear. |
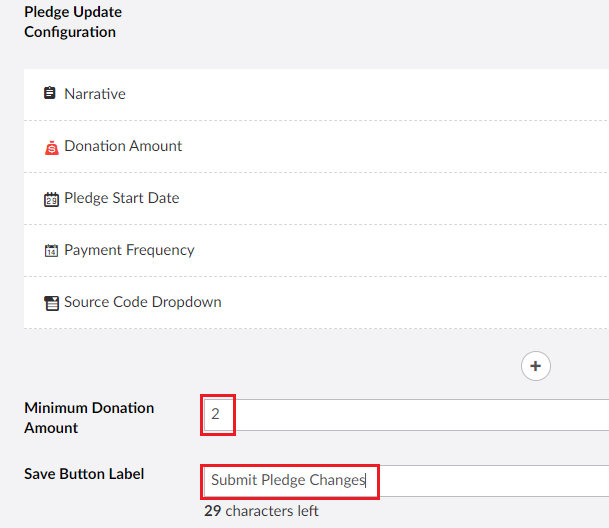
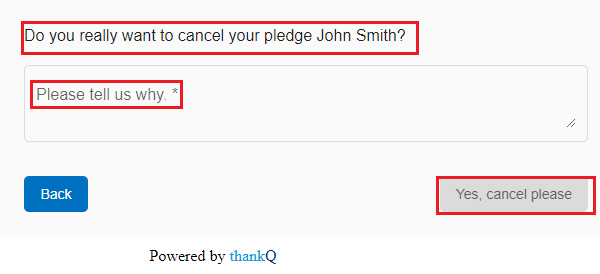
| 22. | After you have added the above widgets to the Pledge Update interface there are two additional options you can change which are the Minimum Donation Amount and the Save Button Label: |
 |
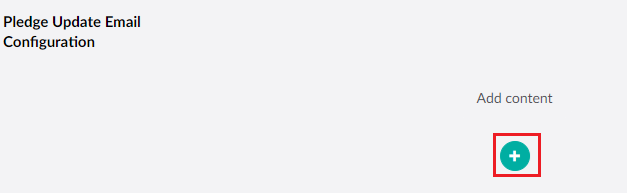
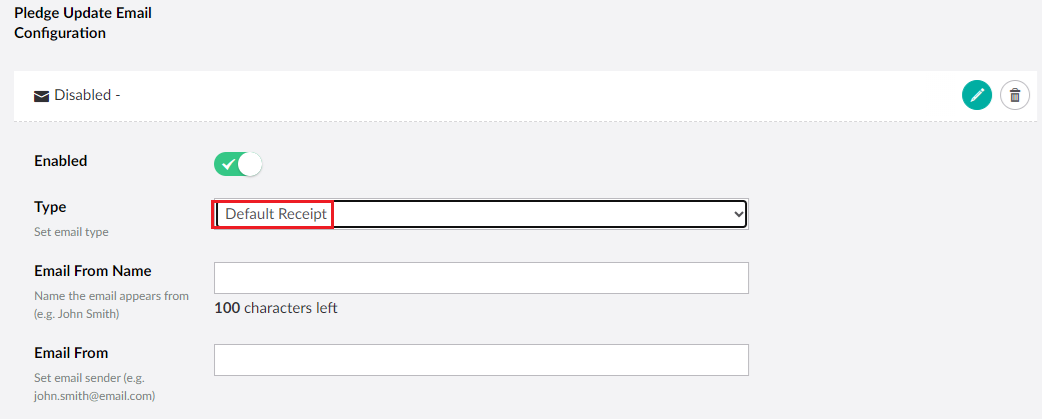
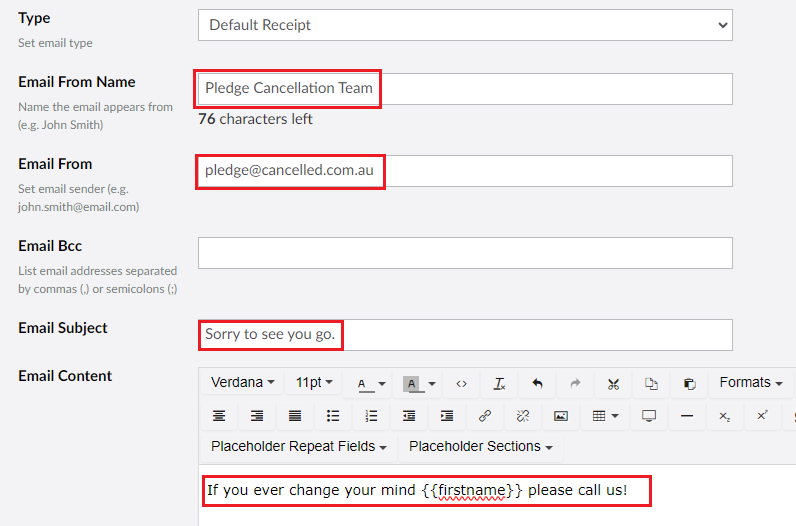
| 23. | You can also choose to create a custom email that will be sent to the user if they change any of their pledge details. Use the + icon to add this (if you don't want to send an email skip steps 23 to 26): |
| 24. | Fill out the details of this email as you would for the other emails including Placeholder Fields, etc. See Registration Confirmation Page for details on how to setup confirmation emails in general. An example of the Placeholder fields you can use and where to find them is provided below: |
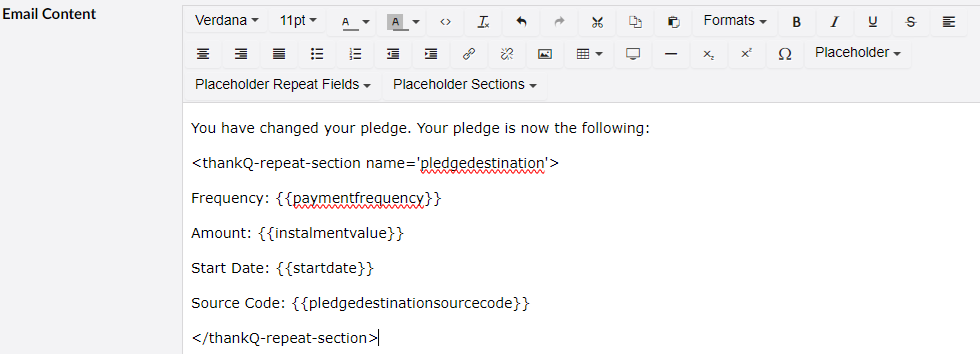
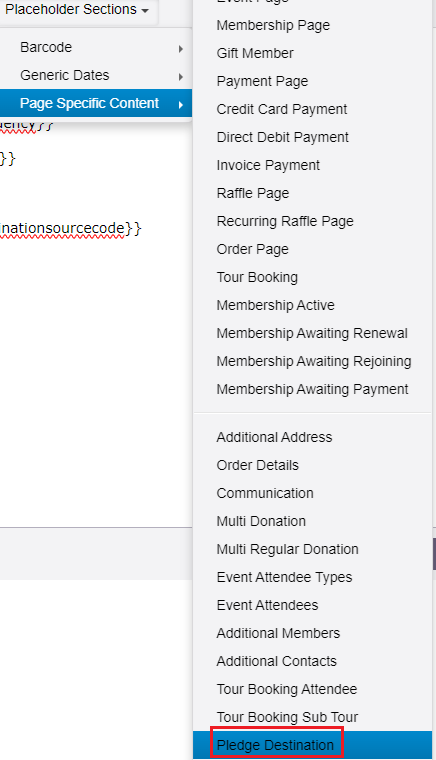
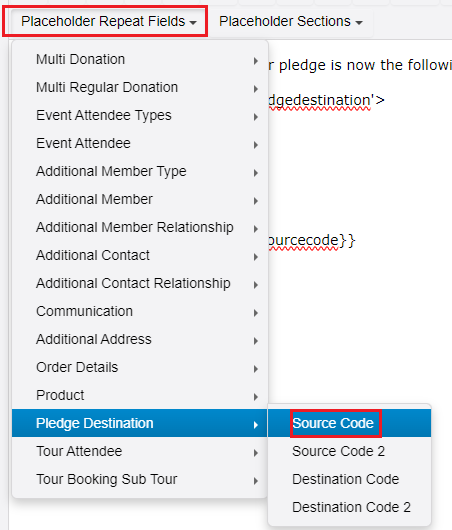
| 25. | To get the Placeholder Fields in the above example use Page Specific Content --> Pledge Destination to create required the section: |
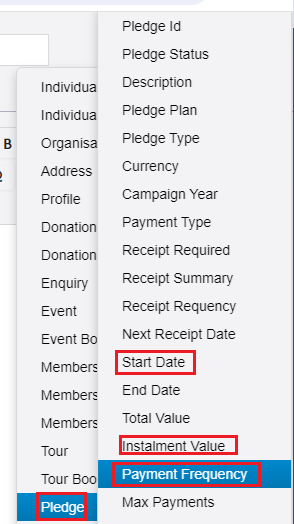
26. Then add these fields:

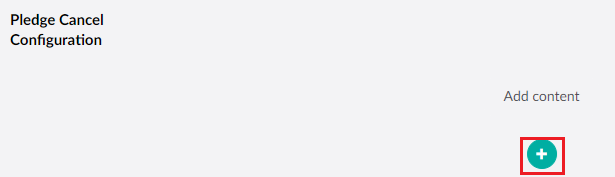
| 28. | You may optionally add a mechanism for users to cancel an existing pledge they have entirely. To do this use the + icon and this will add a Cancel Pledge Settings widget to the page. If you don't want this feature skip steps 28 to 31: |
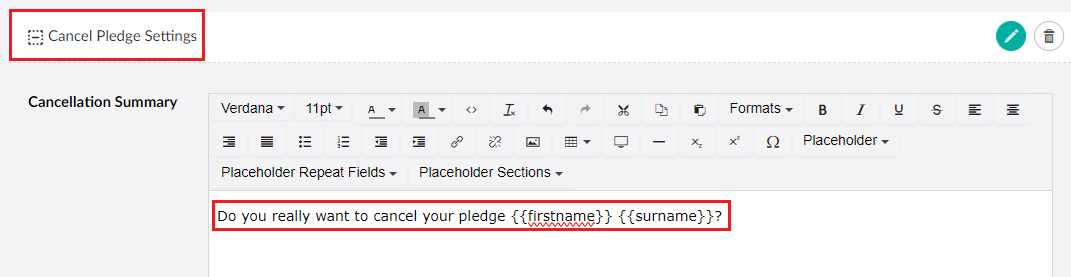
29. Add a Cancellation Summary that will appear on the cancellation page:
30. You can also change the text box/button labels on the cancellation page:

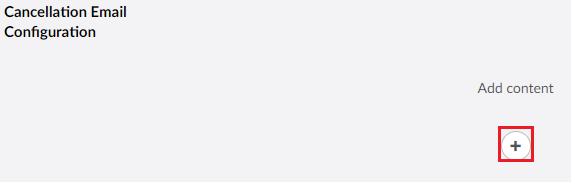
| 31. | Optionally you can also send an email to the user after they have canceled their pledge. Use the + icon to add this and fill out the email details in a way similar to the other emails: |
32. Once you have finished setting this up press Save and publish to save the page (so that you don't lose any of the changes you have made).