thankQ Help
Now that the confirmation page has been setup you should now proceed to setup the Unsubscribe Page itself.
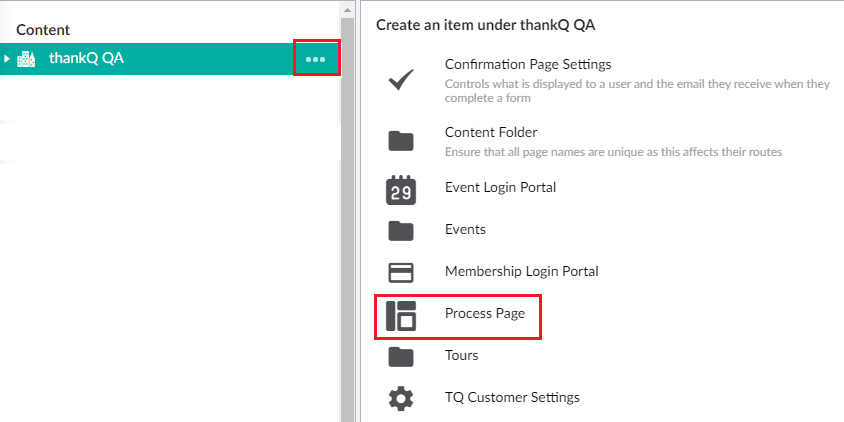
1. Select your company code and select the three little dots on the right and then select Process Page:
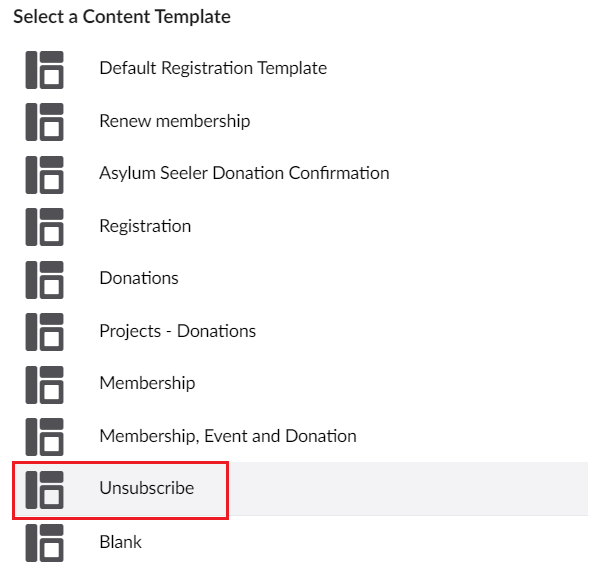
2. Select Unsubscribe as the template:
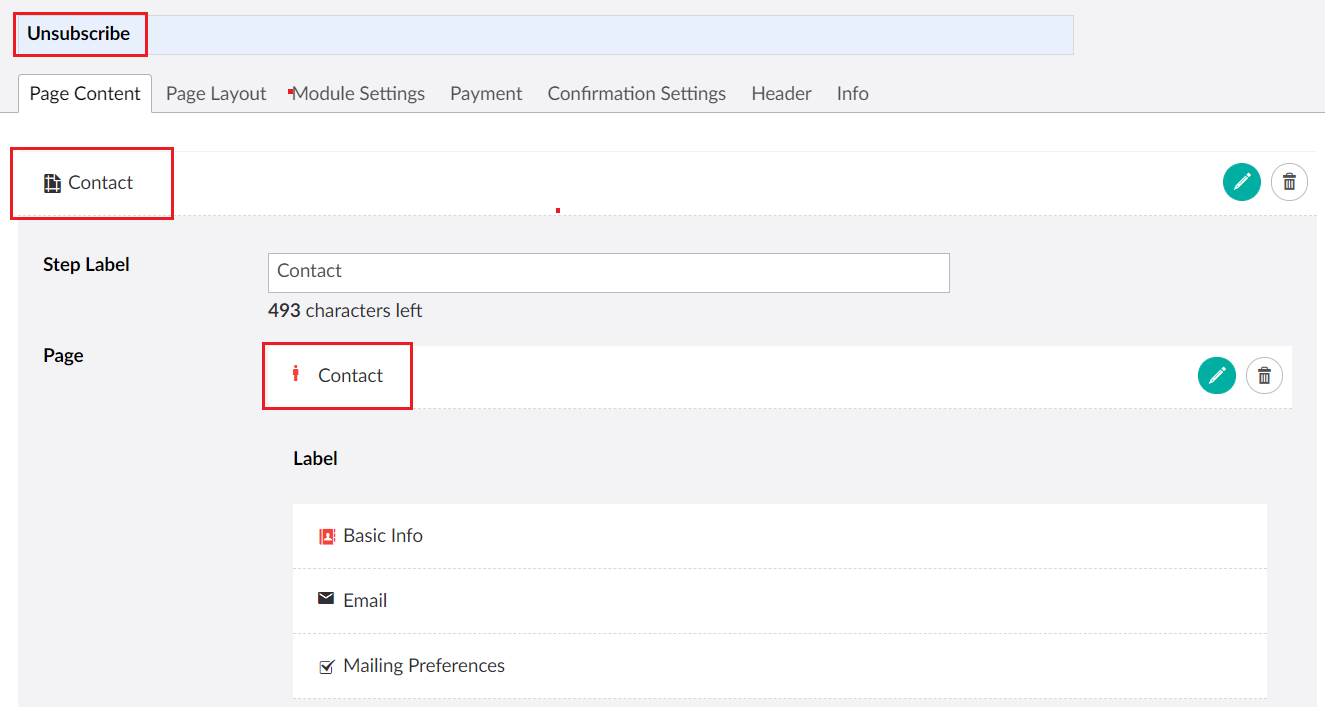
3. You should now have a template page that you can now add your unsubscribe preferences to:
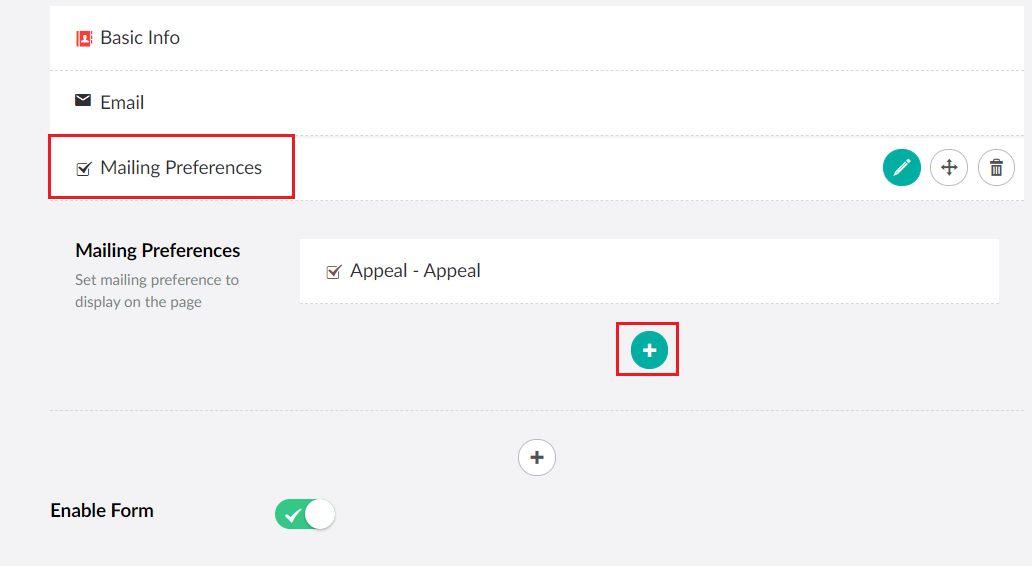
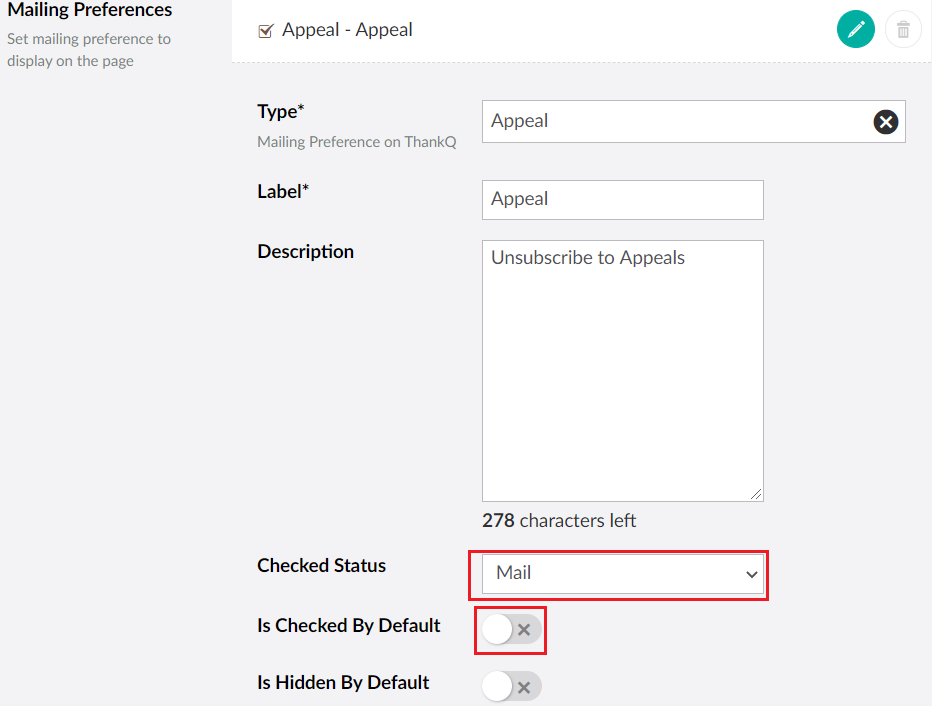
| 4. | Edit or Remove any Mailing Preferences that are not required and/or create more as required. See Mailing Preference Setup for more information on what the options here will do: |
| 5. | Untick the Mailing Methods: |

| 6. | You may also wish to setup this page with other information such as a Headers, Footers or Narratives. Please see the setting up Registration Page for more information on how to do these things. |
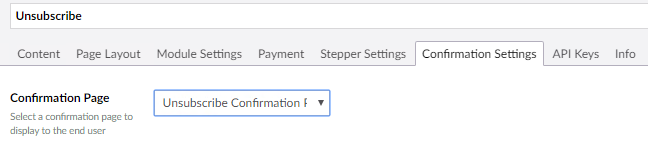
| 7. | Click on the Confirmation Settings tab. |
| 8. | Click the drop down beside Confirmation Page and select the Unsubscribe Confirmation Page. If this does not appear click onto the Confirmation Page under Content and then back onto the new subscribe content: |
| 9. | Click Save and publish when you are finished setting this page up. |
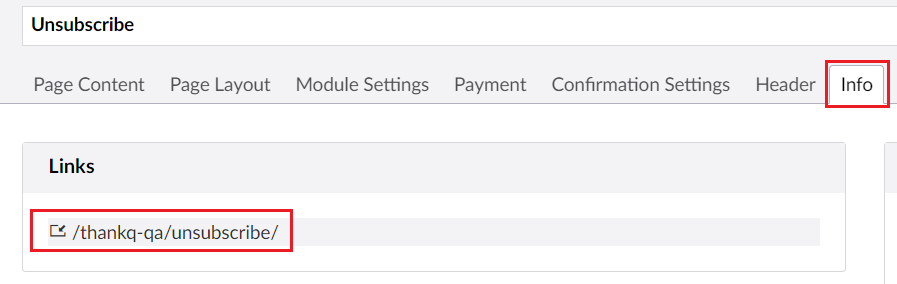
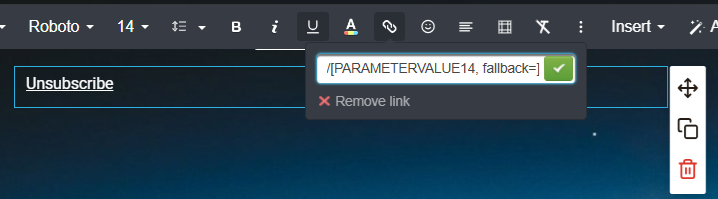
| 10. | Use the link under the Info tab to insert into the Unsubscribe button you create in eMailer. |
| 11. | Paste the link under any buttons or links in the eMailer Campaign and enter serialNumber/[PARAMETERVALUE14, fallback=] on the end so when this is downloaded to thankQ it can directly match the contact via their serial number. |
| An example of what a full unsubscribe link would look like is the following: |
| https://web.thankqportal.com/thankq-qa/unsubscribe/serialNumber/[PARAMETERVALUE14, fallback=] |
The button in the eMailer template:
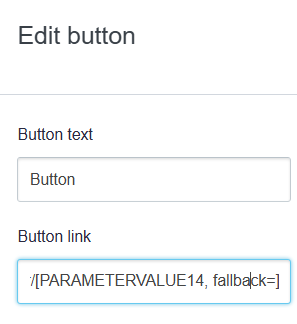
Alternatively you can use a link instead of a button:
It should be noted as well that the Campaign Monitor website requires the presence of an Unsubscribe link. This requirement is for ALL email campaigns and it cannot be removed from the campaign. The thankQ unsubscribe link cannot replace that link.
To avoid confusion of the receiving users you should add text in the email template to note the difference between unsubscribing and the user managing their email preferences:

For more details on this requirement see the Campaign Monitor help:
https://help.createsend.com/admin/s/article/admin-unsubscribe-links-in-emails
| NOTE: If PARAMETERVALUE14 does not appear in the Campaign Monitor template this may be due to the merge field availability being set to No in the Lookup Values. To enable this open thankQ and then Lookup Values and look for Mailing-->eMailer Available Merge Fields. In this list you will need to set PARAMETERVALUE14 to Yes. |

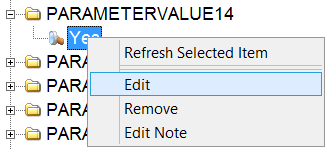
After that upload the campaign again.