thankQ Help
|
Please ensure all other word documents are closed before creating the Include Text File. |

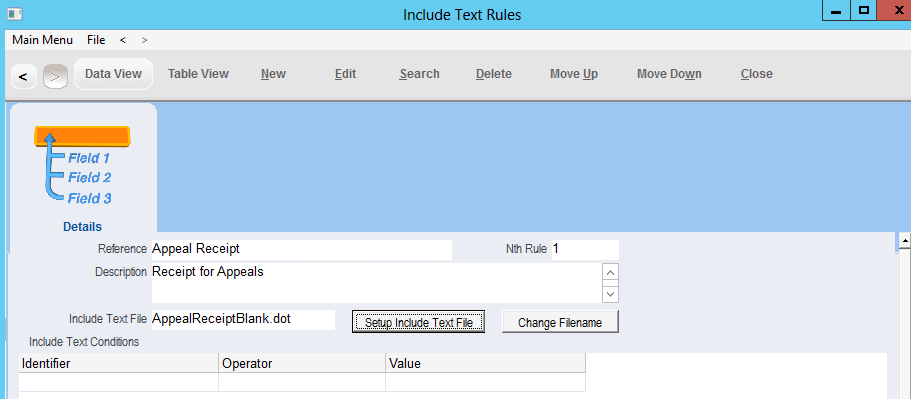
1.Click the Set up Include Text File button on the Include Text Rules Form.

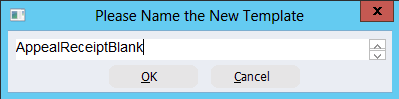
2.The Please Name the New Template dialog box will open. Enter a suitable filename for the default template and click OK.
3.As this is the first include text template, click No when asked to make a copy of an existing template.
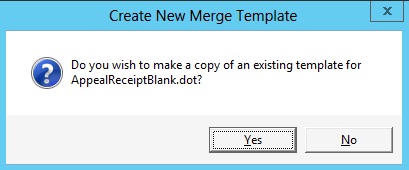
4.Click Yes to create a new blank Word document.

5.A new blank document will open. Enter suitable text for this default text rule. Remember to keep it general as this text will only be used if no other include text rule conditions are met.
Note: Ensure that the text is in the SAME font and font size as the main template.

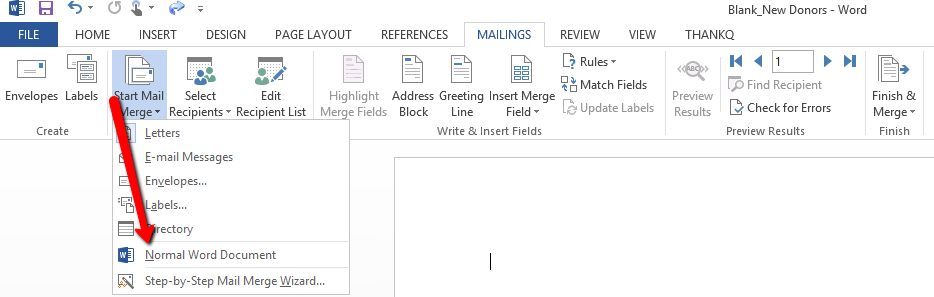
6.Click the Mailings tab on the ribbon
7.Click Start Mail Merge
8.Select Normal Word Document
9.Click Save and close the document. The document name will be displayed in the Include Text File box on the Include Text Rules Form.Save and close the document. The document name will be displayed in the Include Text File box on the Include Text Rules Form.