thankQ Help
A text box is a field that the contact can enter information
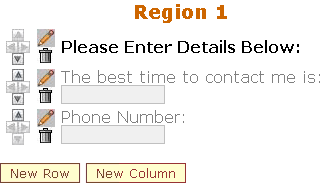
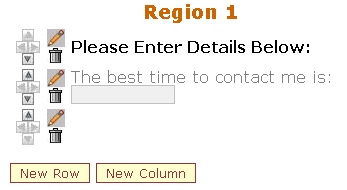
1.Click the Next Row button to add another row under Region 1 and click the Pencil
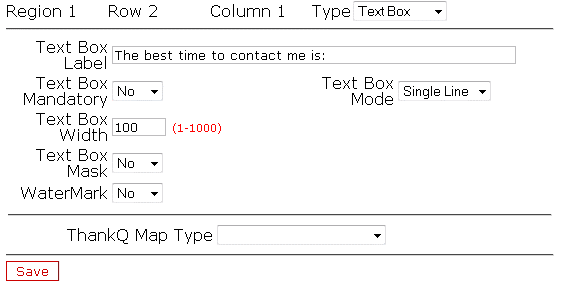
2.Select Text Box as the Type

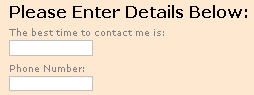
3.In the Text Box Label field enter the label (field name) that will appear above the text box

4.Set the Text Box Mandatory field to Yes if the information for this text box is required
5.In the Text Box Mode you can set for Single Line or Multi Line. If Multi Line, the field will allow text entered on multiple lines and provide scroll buttons to the right side of the field

6.The Text Box Width setting determines how wide, in pixel measurement, the display size of the field’s box is. The size range is from 1 pixel to 1,000 pixels

The Text Box Height setting determines how high in pixel measurement the display size of the field’s box is. The size range is from 1 pixel to 500 pixels.
Note this field setting will only appear if the user selects the Multi Line setting

7.The Text Box Mask setting allows for a certain formatting to apply when data is entered into that particular field. This allows for consistency of data entry when a particular type of data is entered.

The Mask Type setting determines what type of formatting is applied
Note this field setting will only appear if the Text Box Mask setting is set to Yes
Currently the data type available is for Date formatting only
Further development is required for other formatting types such phone numbers etc.

8.Select if this text box is to be a WaterMark. Watermark will enter the text into the field rather than displayed as a heading.

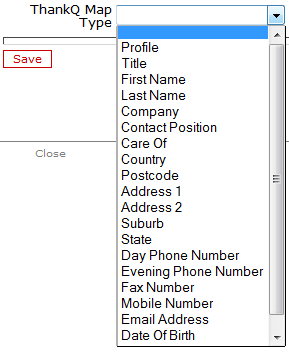
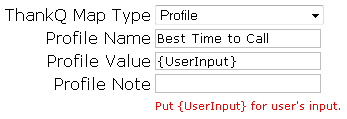
The ThankQ Map Type allows for data entered into the eRegister web form to be mapped to a corresponding field in ThankQ. For example in the Contact Details form under a particular tab or Form Key area
Note: whichever ThankQ Map Type value is chosen will determine if further fields will be displayed and need to be filled on the Field Settings form
9.In the Field Settings window click the Save button, then the Close and Return button to return and view the text box in the Client Page Layout Settings form.
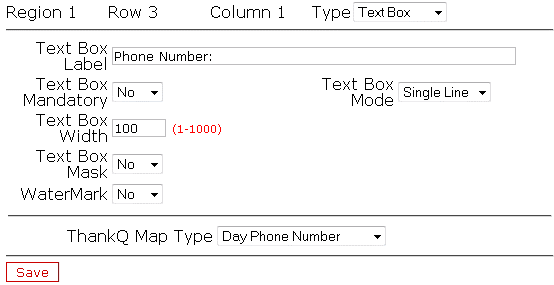
10.Click on the Next Row button and Pencil to create another Text Box for Phone No.
11.Fill in the required fields. The thankQ Map Type can be mapped to a telephone field
12.Click Save
13.Click Close And Return