thankQ Help
The Mail Segmentation options within Mail Manager enable different contacts within the same mailing to receive different letters.
For example, contacts that have already donated could receive a different letter to those that haven’t yet donated.
Segmenting a mailing can reduce your larger mailings into more manageable sections, or allow you to test a letter on a random selection of contacts, or group similar contact records together based on a specific field.
Contacts do not duplicate in the mailing so if the same contact is in more than one loaded group or search, once the contact is loaded they will not be loaded again so the order of loading is dependent upon which communication they receive.
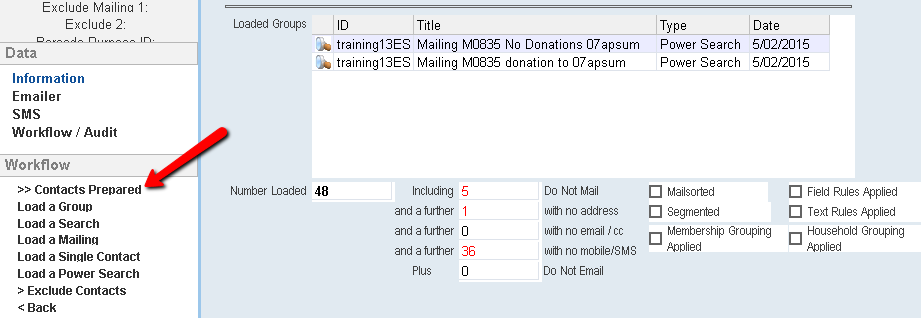
1.After loading the Power Searches click the Contacts Prepared workflow option.
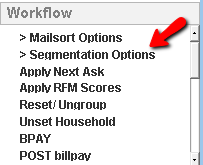
2.Click on the Advanced Configuration workflow option

3.Click on the Segmentation Options workflow option
There are a number of segmentation options to choose from and these are covered in the following table. In this table, ‘N’ represents a number that you input.
|
One in N This option splits the mailing into two segments, the first containing every Nth entry in the mailing and the second containing the remainder. For example where you specify that N=5, the first segment will comprise every 5th entry in the mailing, while the second segment will contain the remaining entries. |
||
|
|
||
|
First N and the rest This option splits the mailing into two segments, the first containing the first N entries in the mailing and the second containing the remainder. For example, where you specify that N=50, the first segment will comprise the first 50 entries in the mailing, while the second segment will contain the remaining entries. |
||
|
|
||
|
Groups of N contacts This option splits the mailing into equal segments, each of the size N, with the final segment containing the remaining entries. For example, where you specify that N=20. The mailing will be split into segments, each containing 20 entries. Where the mailing is no divisible by 20 exactly, the final segment will contain the remaining entries. |
||
|
|
||
|
Into N Groups This option splits the mailing into N segments. For example where specify that N=6, the mailing will be organised into 6 segments. |
||
|
|
||
|
N randomly selected This option splits the mailing into two segments the first containing N randomly selected entries and the second containing the remainder. For example, where you specify that N=5, the first segment will comprise 5 entries, randomly selected, whilst the second segment will contain the remaining entries. |
||
|
|
||
|
Groups based on field X This option allows you to select a form field, which will then be used as a basis for splitting the mailing into groups. This option can also be loaded to segment your mailing based on the groups loaded into mail manager. |
||
|
|
|
|
|
Numeric Grouping on Value Ranges Similar to the Groups based on field X option, except that you can group several changes in fields into one segment. |
||
|
|
|
|
|
Apply Assumed Household Similar to the Apply Household option. This option assumes household based on postcode and first part of the address. |
||
|
|
|
|
|
Apply Membership Setting this option will only allow one mailing per Membership |
||


In this example, we will segment the mailing into two segments. Those that have donated and those that have not donated. This will allow a different letter to be sent to each group.
4.Click on the Groups Based on field X segmentation option.

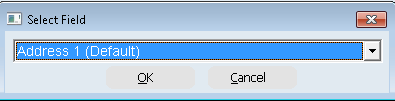
5.The Select Field dialog box will open with a list of fields that can be used to segment the mailing.
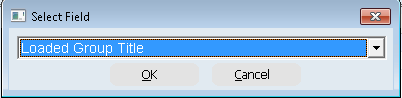
6.In this example, the mailing will be segmented by Loaded Groups. This will send a different letter to each group or search loaded into the mailing.
|
|

7.Select the Loaded Group Title option and click OK.
8.A tick will automatically appear in the Segmented check box to indicate that the mailing has been segmented.

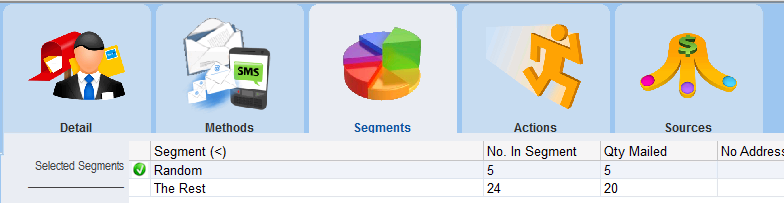
9.Click on the Segments tab to view the number of contacts in each segment including contacts with no postal address.
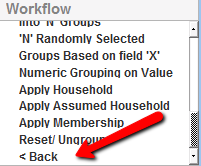
10.To continue with the mailing, click the Back workflow icon to take you out of the Segmentation options.
11.Apply Households (if required) and then click on the Merge Options workflow option.
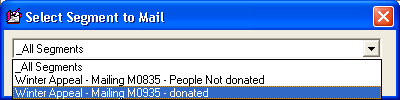
12.When you select your merge method (eg Merge to Word, Merge to PDF, Report to Other etc), you will be prompted to select the segment to merge.
13.When the merge has been completed, the Qty Mailed tab will state the number of contacts in the segment that were mailed. (You will need to view the Segments tab to see this).
14.Select your merge method for the next segment (which can be different from the first segment). The Select Segment to Mail dialog box will only display segments that have not yet been mailed. Either select a specific segment or select All Segments to send the same letter to all remaining segments.