thankQ Help
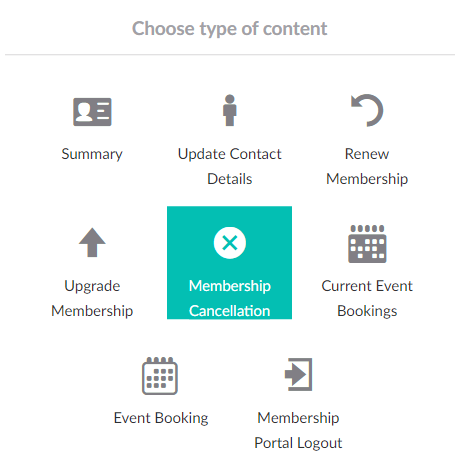
Your membership portal can also have additional options including the Upgrading and Canceling of Memberships.
Before adding anything here check that you have a Membership Purchase page setup so that Membership Upgrades can be purchased.
To set these additional features up please follow the steps below.
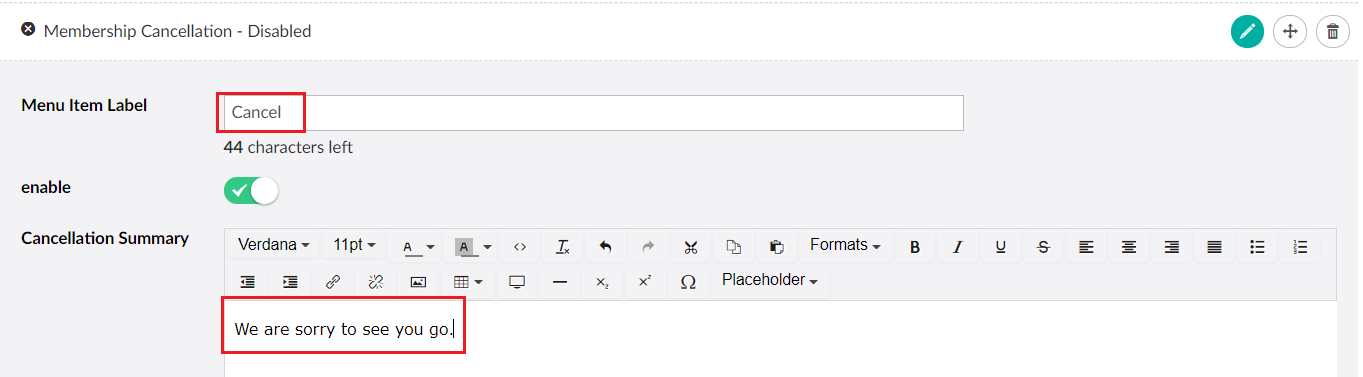
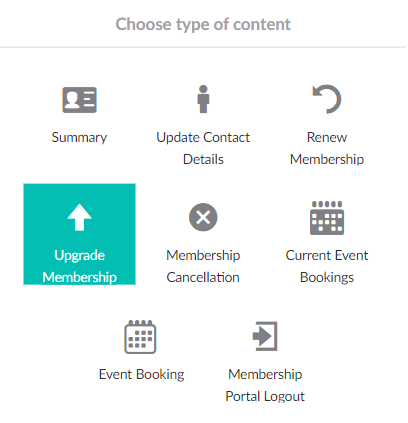
1.To setup the Cancel Memberships option click the + icon and select Membership Cancellation.
2. Make sure you give a text description and text for the labels.
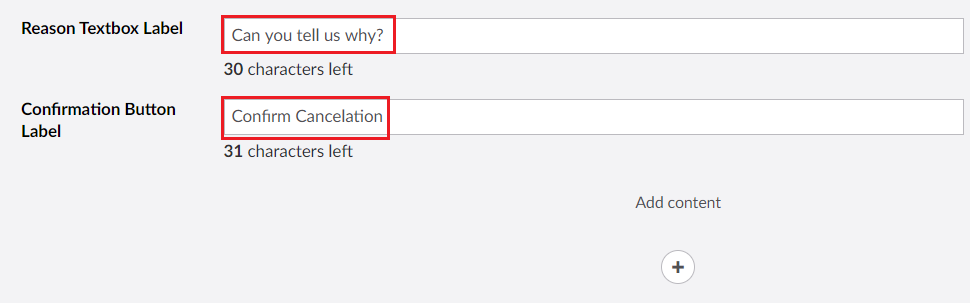
3. You can also send a cancelation email to the users once they have confirmed that they no longer want the membership.

4. Make sure that you set the email type to Membership Cancellation and enter the email contents.

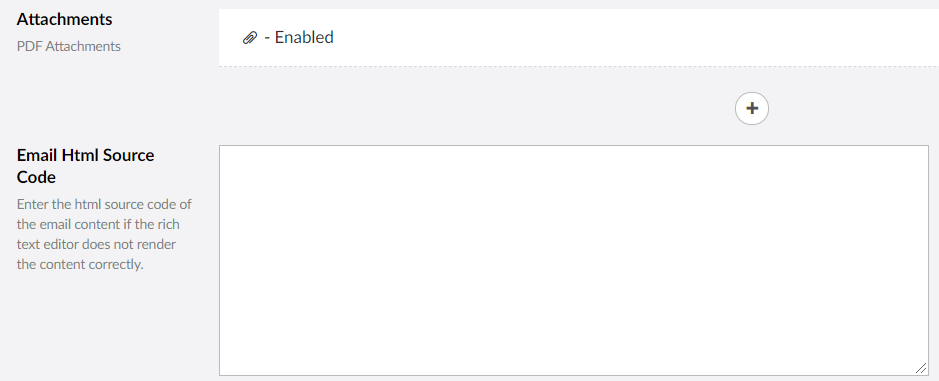
5. Note: You can also add attachments and HTML code to the email if you want.
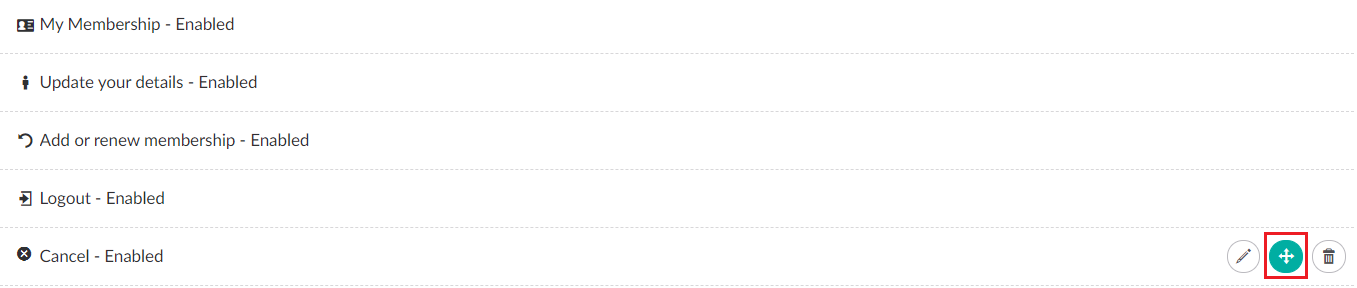
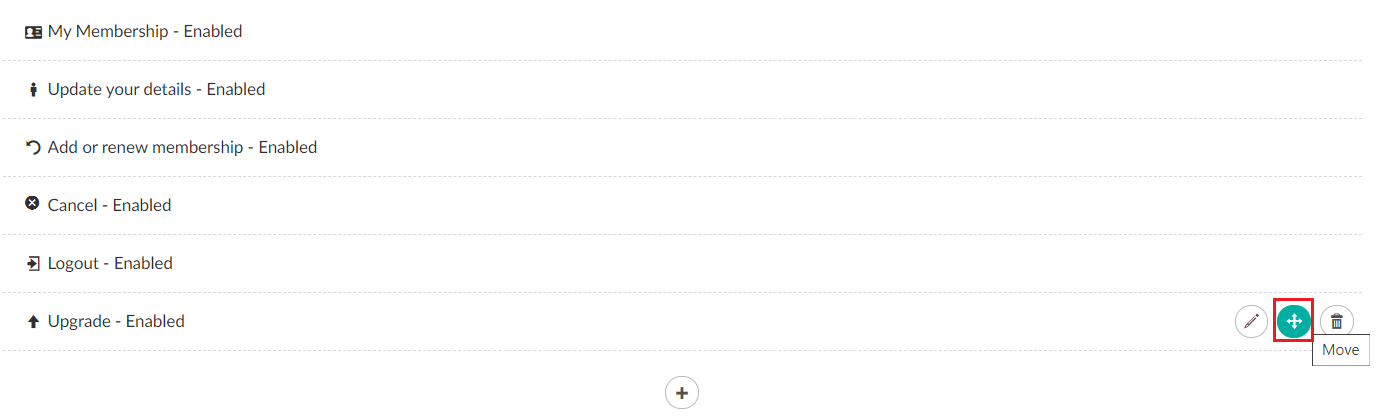
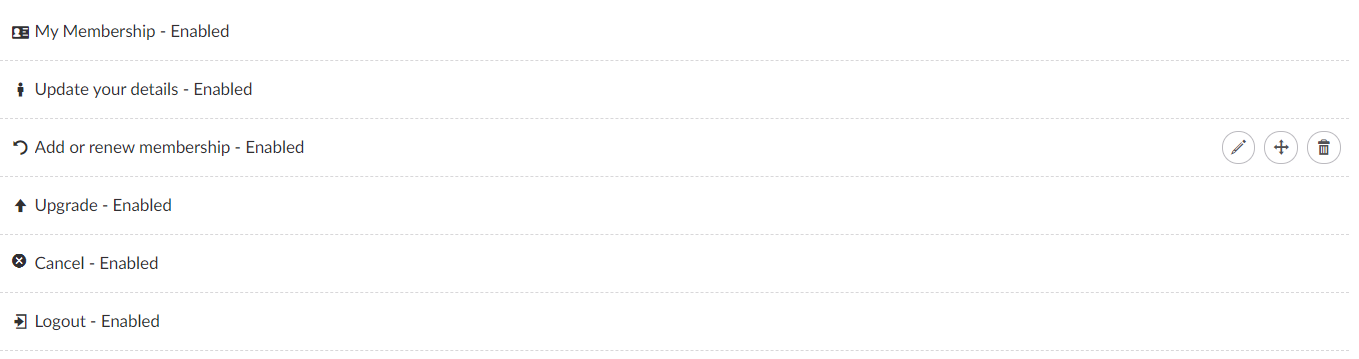
6. Once you have finished move the Cancel option to be above the logout button on the page.
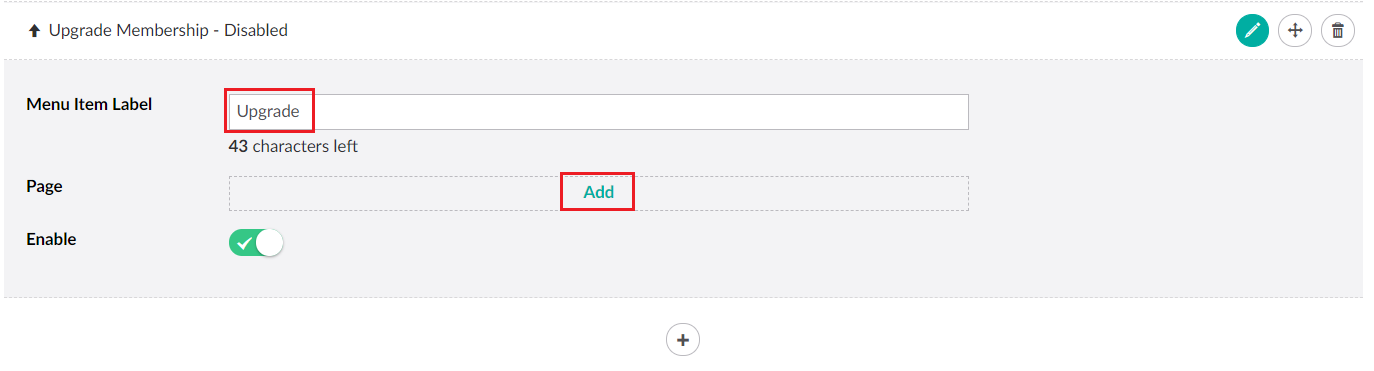
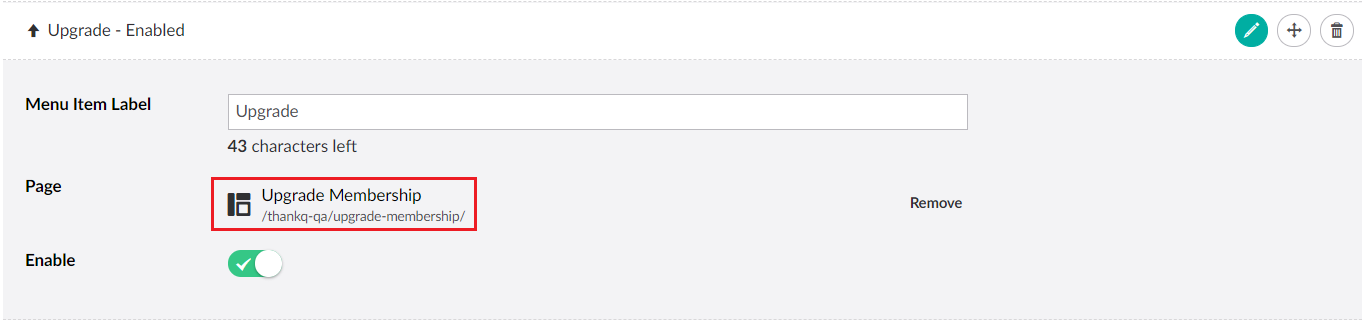
7. To setup the Upgrade Membership option click the + icon.
8. Make sure that you give this option a label and that you have linked in an Upgrade Membership Page.
9. Once you have finished move the Upgrade option to be above the logout and cancel buttons on the page.
10. Don't forget to click Save and publish when you have finished.