thankQ Help
If you want the logged in user to have the ability to change certain other details about their Event Booking then you will need to create a new Event Page to link to the portal. To do this please make sure that you have familiarised yourself with the process for creating Event Pages via Setup an Event Page.
Before adding anything else to the Event Portal check that you have set up the following Process Pages setup:
- A Contact Registration page (for updating booking details).
- An Event Booking page (for Adding Event Attendees).
Once these are setup you can now link them to your portal as follows:
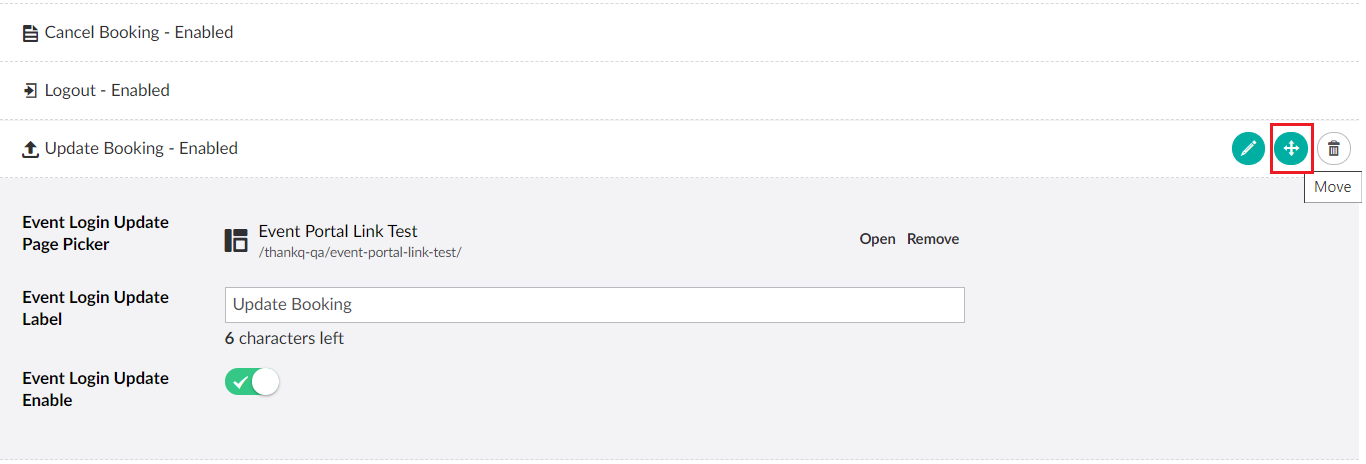
1. Create an Update Booking Details page.
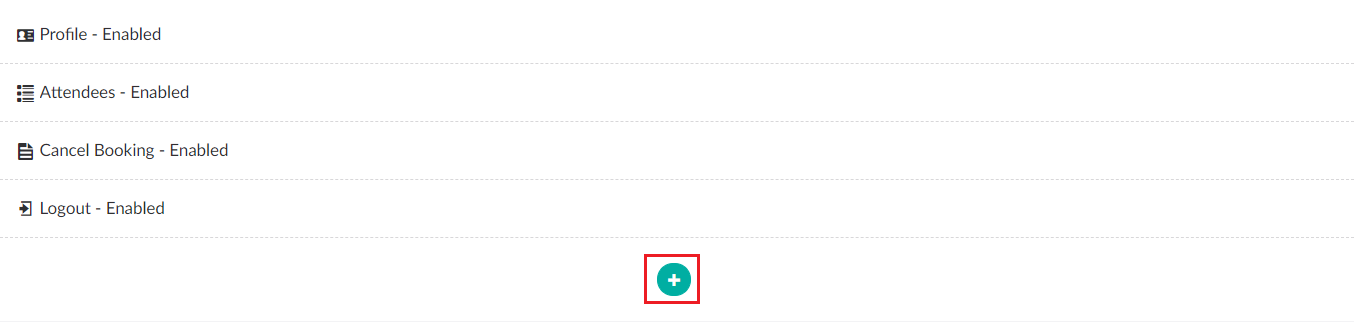
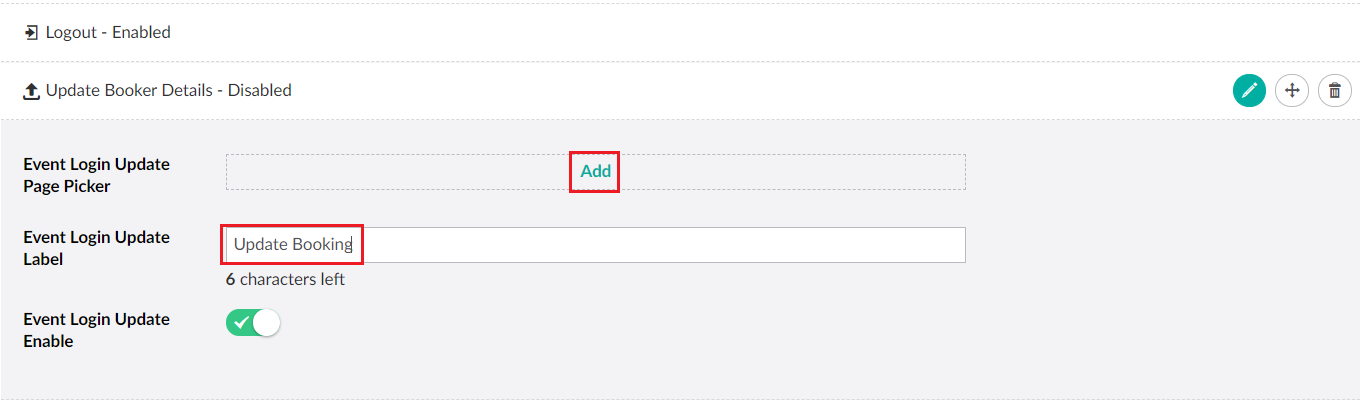
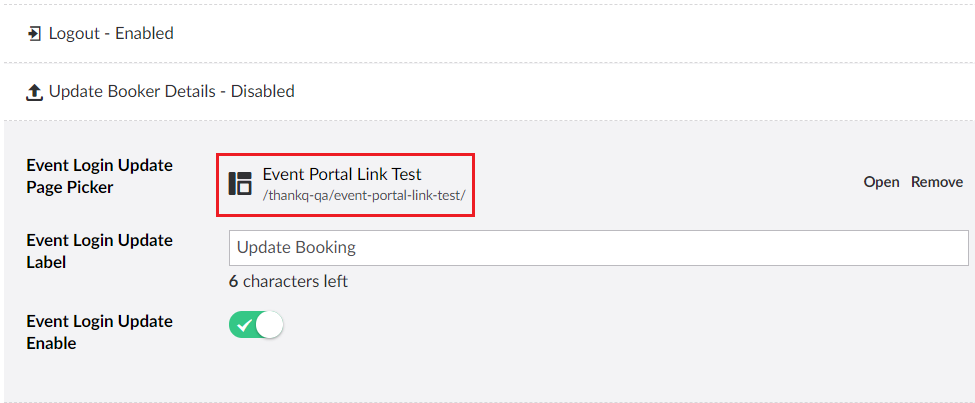
2. Make sure you give the menu option a label and then add the page via the Update Page Picker.
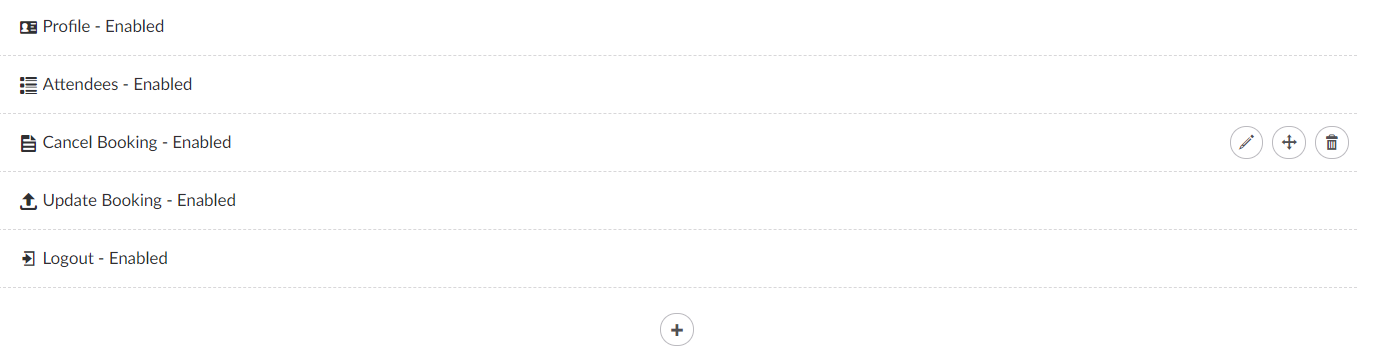
3. Move the Update Booking menu item so that it appears above the logout button.
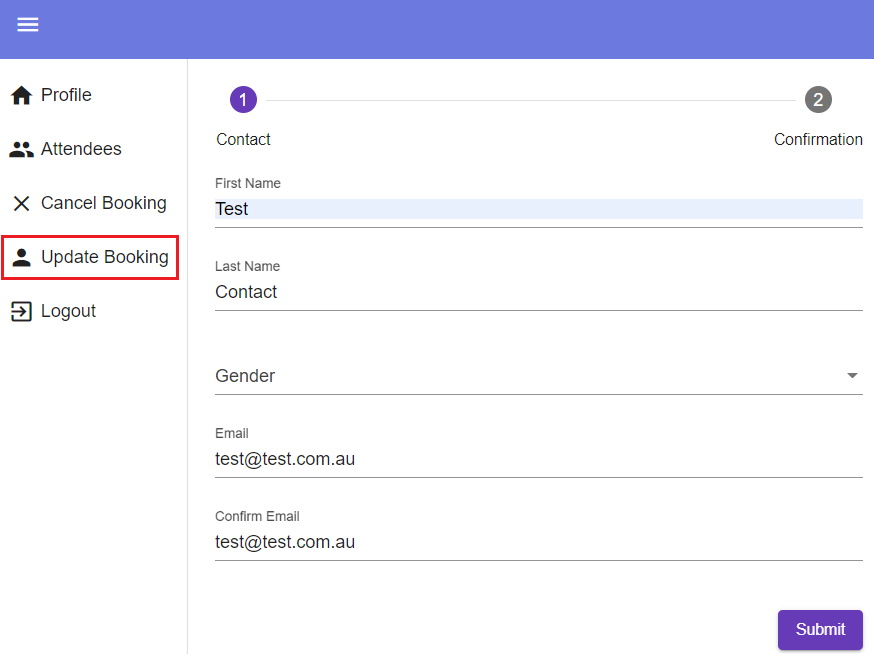
| 4. | The page should now be linked. Login as a contact with an existing booking to verify if this has worked as intended (Note: Use the Save and publish option before testing). |
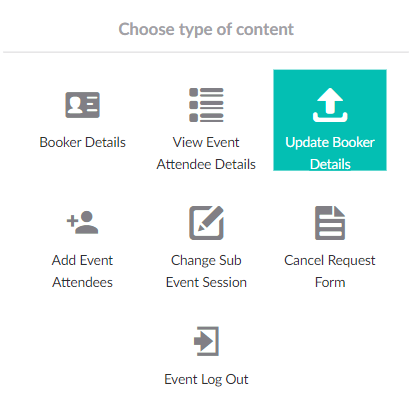
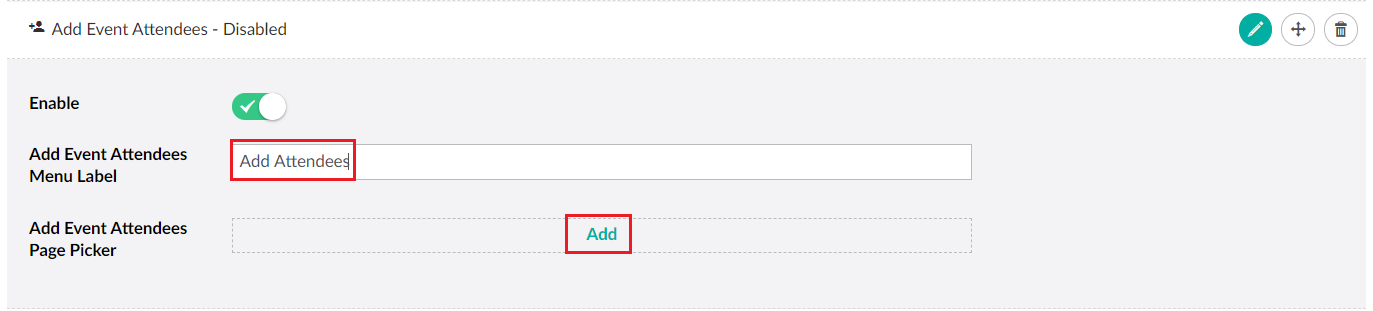
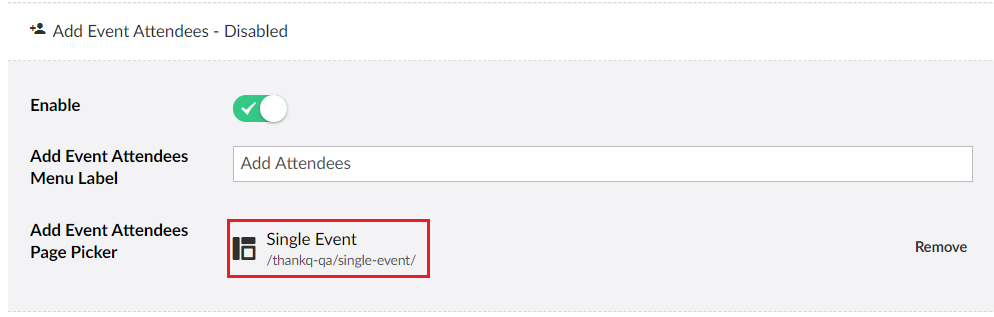
5. Once you have the update page setup and linked you can also create a link for Add Event Attendees page.

6. Make sure you set the label for this menu option and that you have selected a page which allows you to book a new Attendee to an Event.
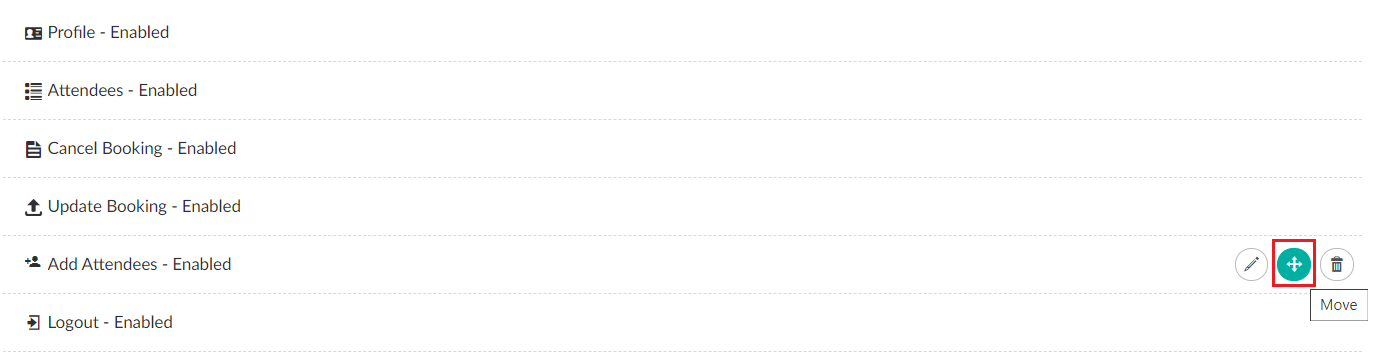
7. Be sure to move the Add Attendees menu option so that is also above the logout button.
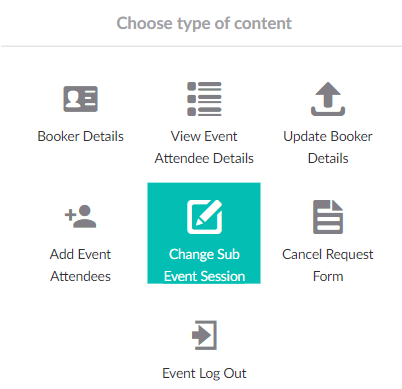
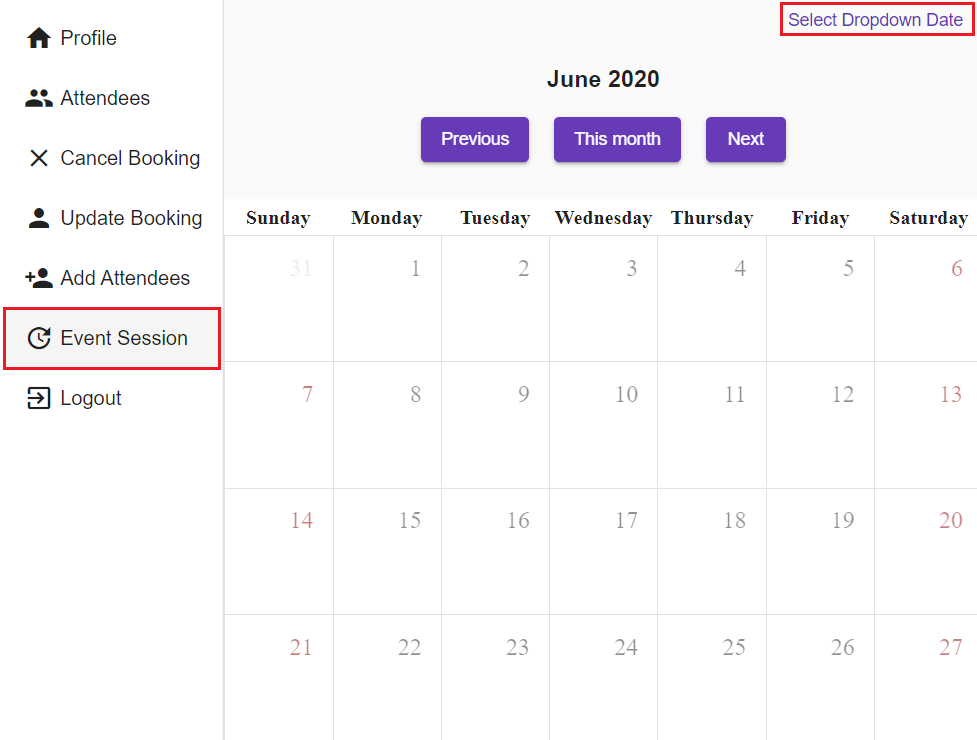
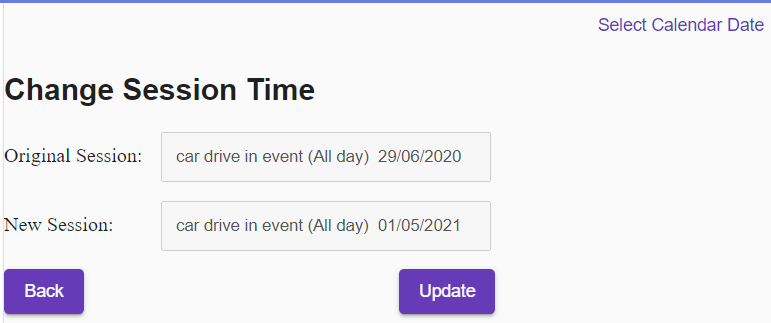
| 8. | If you want users to be able to change the Event Sessions that they have booked then please create this option by selecting Change Sub Event Session. |
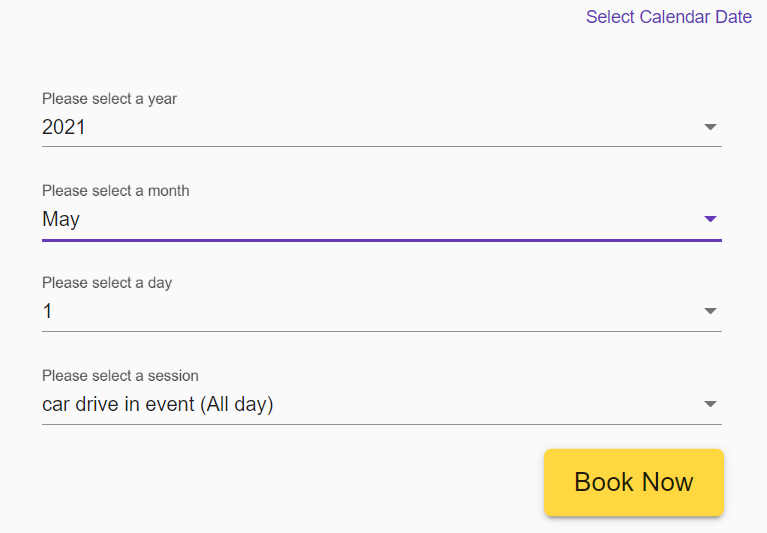
9. Make sure that you set the menu label and the Calender Mode (either a picker or dropdown to select dates for the session).
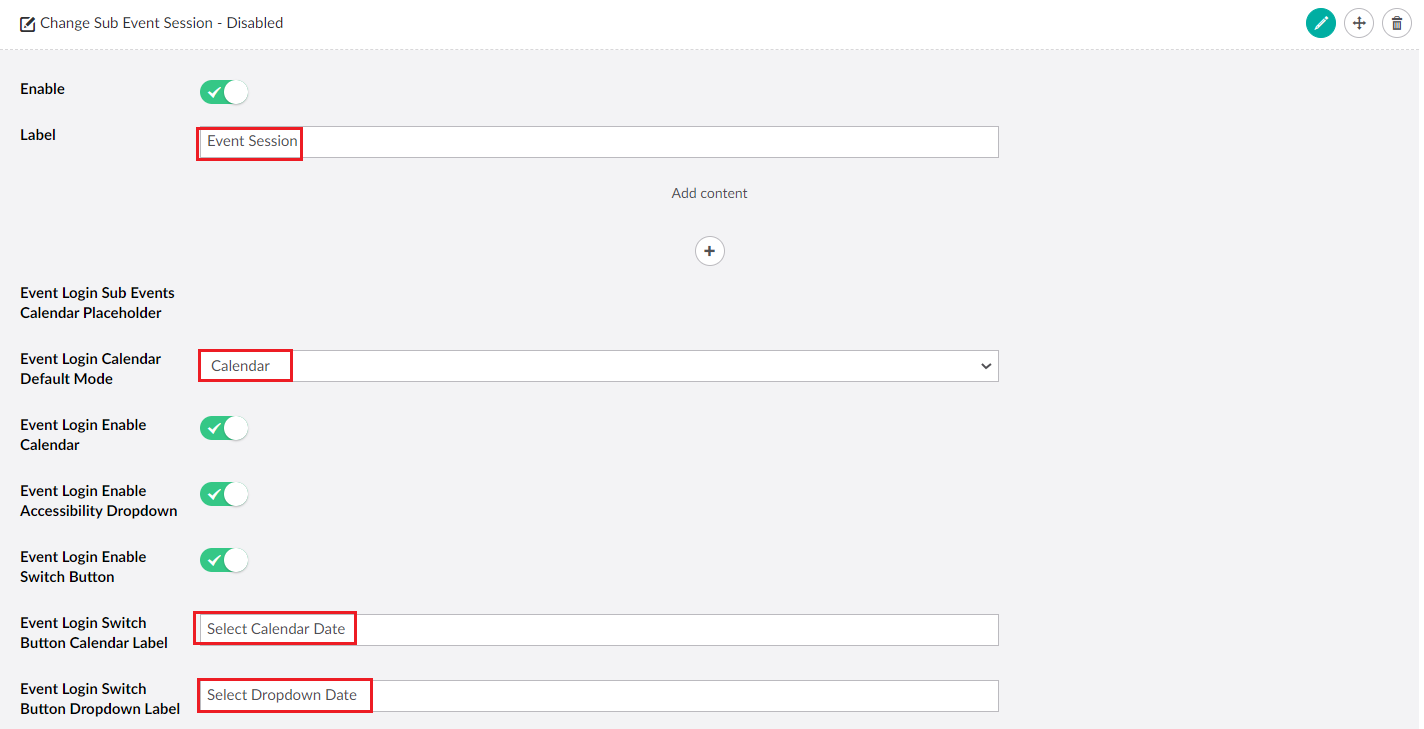
10. Be sure to move the Event Session menu option so that is also above the logout button.

| 11. | As long as the Event has sessions enabled the menu option should appear in the sidebar when the user logs in (remember to Save and publish before testing as well). If Event Sessions are not enabled for this contact the option will be hidden. |
12. Once you have finished select Save and Publish.