thankQ Help
A Communication List is created with the power search to link thankQ and Campaign Monitor.
1.Click New on the Tool Bar.

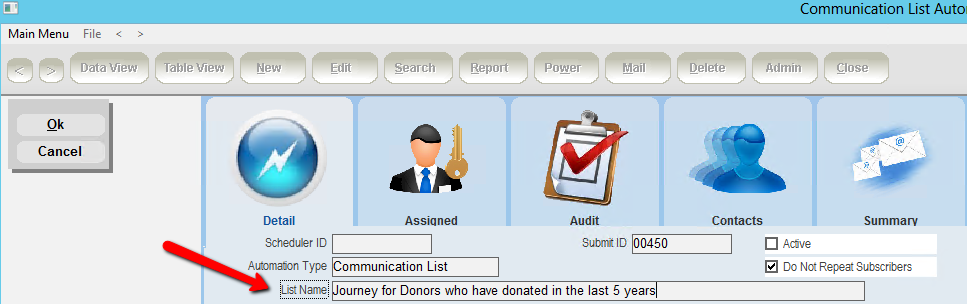
2.Enter a List Name.
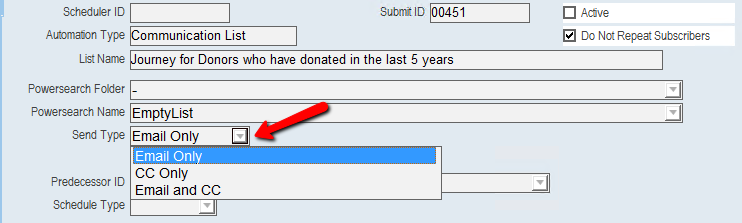
3.Select the Powersearch Folder or if no folder select – from the drop down.
4.Select the Powersearch Name from the drop down, this being the empty list.
5.Select the Send Type from the drop down.
6.Select the Schedule Type to be Daily.
7.Select the Scheduled Time you want this to run, remembering this is a 24 hour clock.
Note: You can set a time that will run in the next fifteen minutes so you can setup the journey.

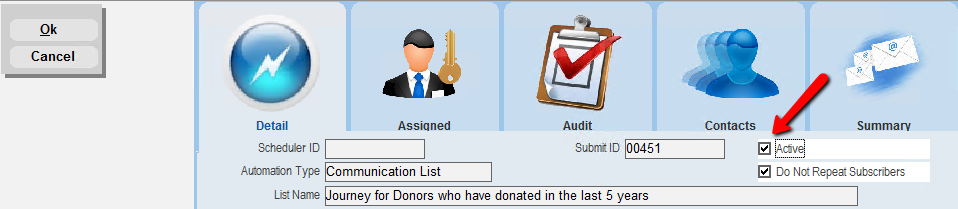
8.Click into the check box beside Active.
9.Click OK to save.
thankQ will not repeat subscribers if the Do Not Repeat Subscribers tick box has been checked.

1.1Include Field Rules (Parameters)
Field Rules can be found under the Communications Modules. There are some custom rules setup already and you can create your own using SQL.
If you do not have any SQL knowledge in your organisation you can log a ticket with Support to request one be created for you. If it is a custom field rule only for your organisation there could be a cost.
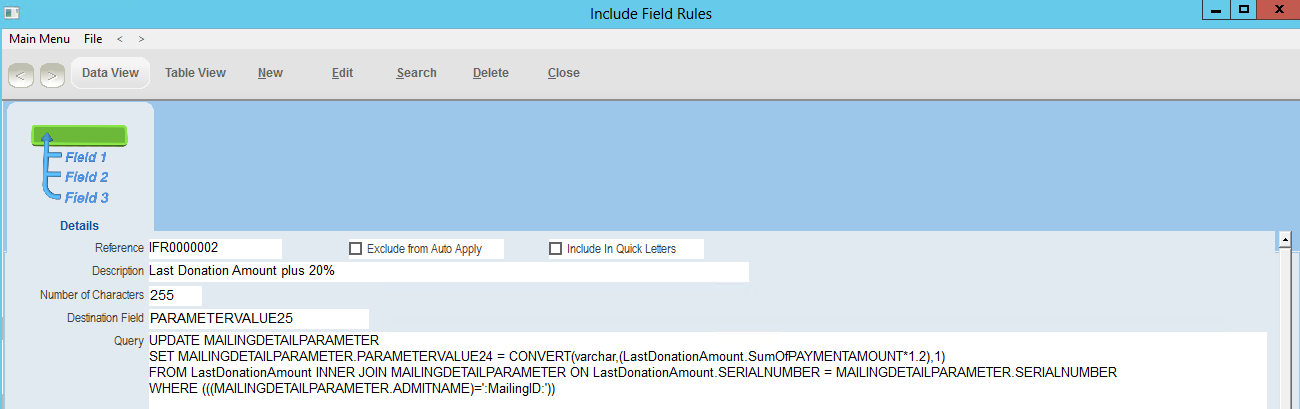
10.Right click in the Include Field Rules window and select Add Parameter / Rule.
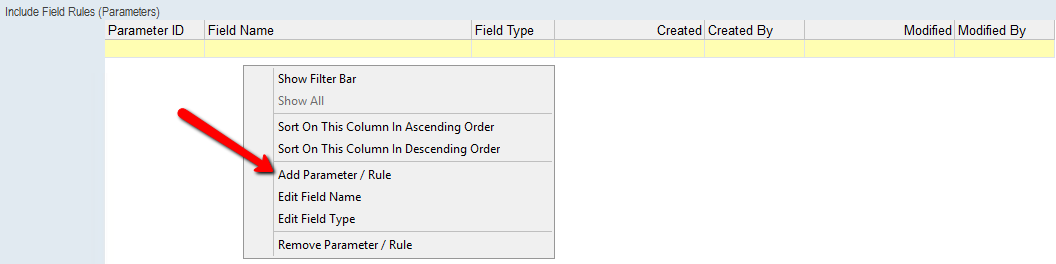
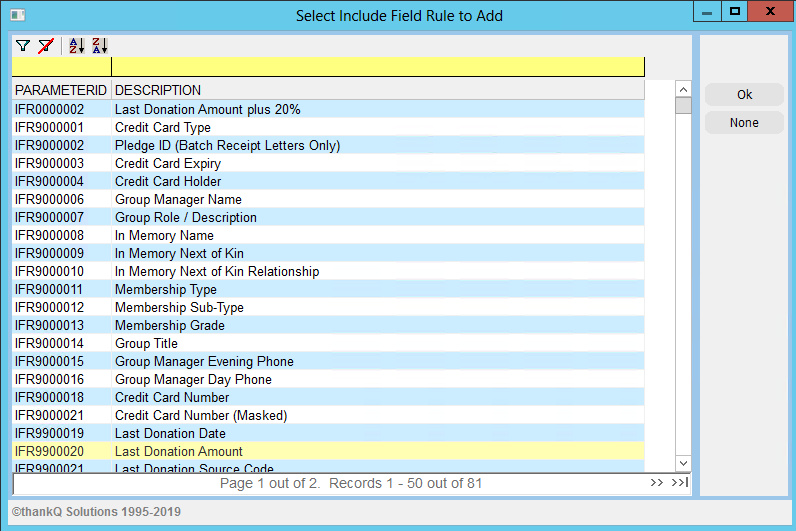
11.Locate the Field Rule you want to add to the Communication.
12.Double click or highlight and click OK to load.
13.Repeat the above until you have all the Field Rules required.

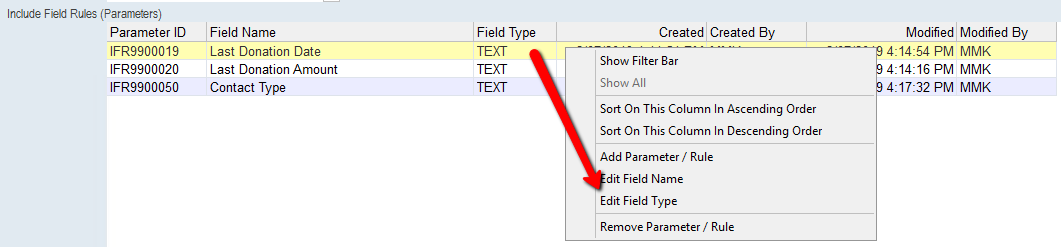
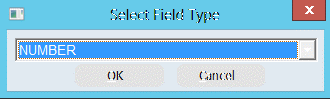
1.1.1Change Field Type
The field types default to Text. If the information is a Date or a Number they should be changed to the type of data they contain.
14.Right click on the Date field name and select Edit Field Type.
15.Select Date from the drop down, click OK.

16.Right click on the Amount field name and select Edit Field Type.
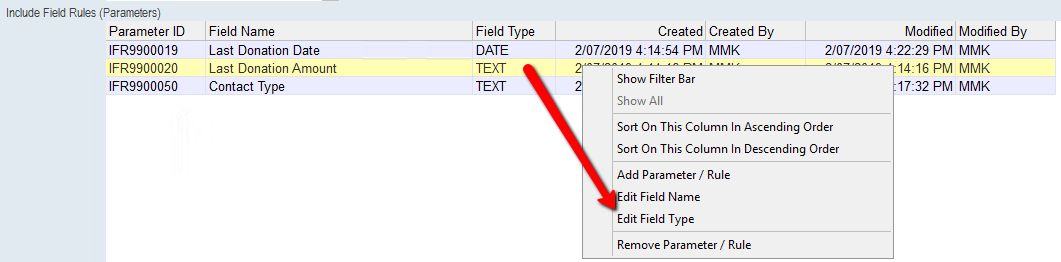
17.Select Number from the drop down, click OK.

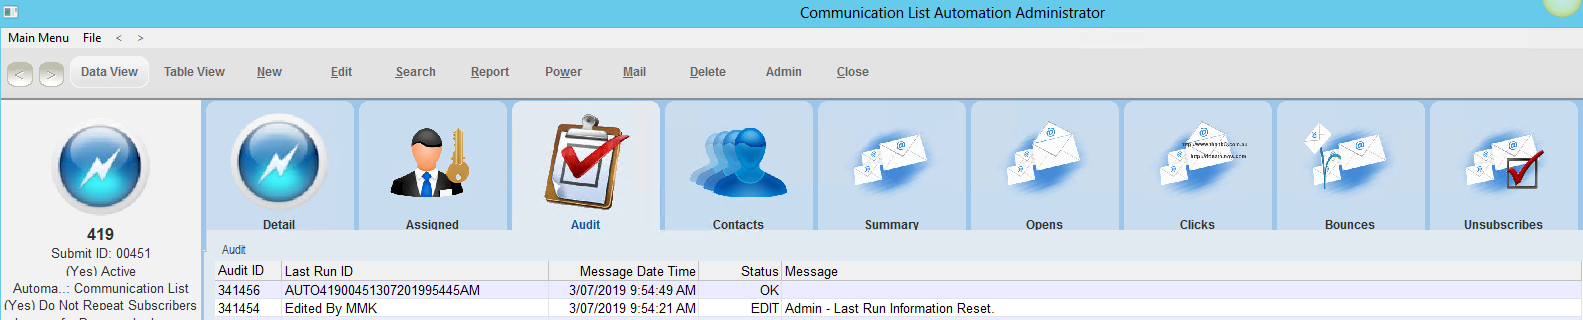
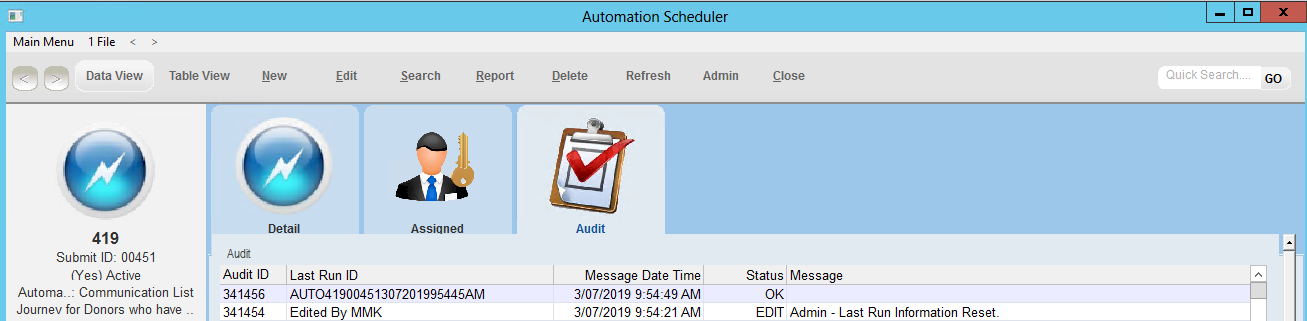
Once the List has been synchronised to Campaign Monitor the Audit tab will show the result. If it is OK the link between thankQ and Campaign Monitor has been made.
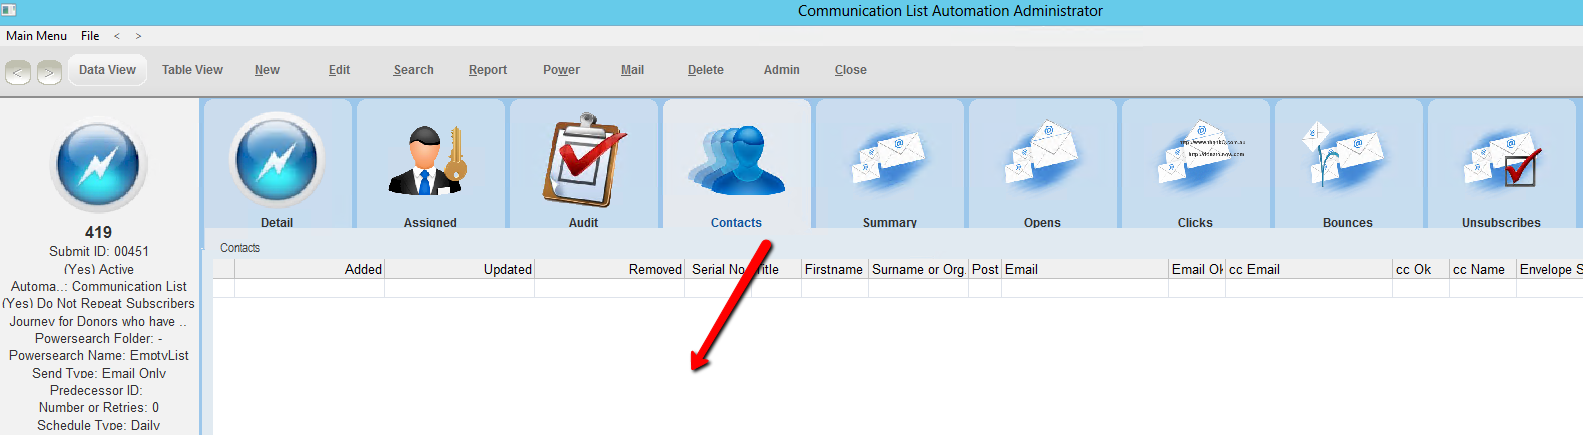
There should also be NO contacts under the Contacts tab before a journey has been created in Campaign Monitor. Since this powersearch was not capturing any contacts there should not be any contacts.
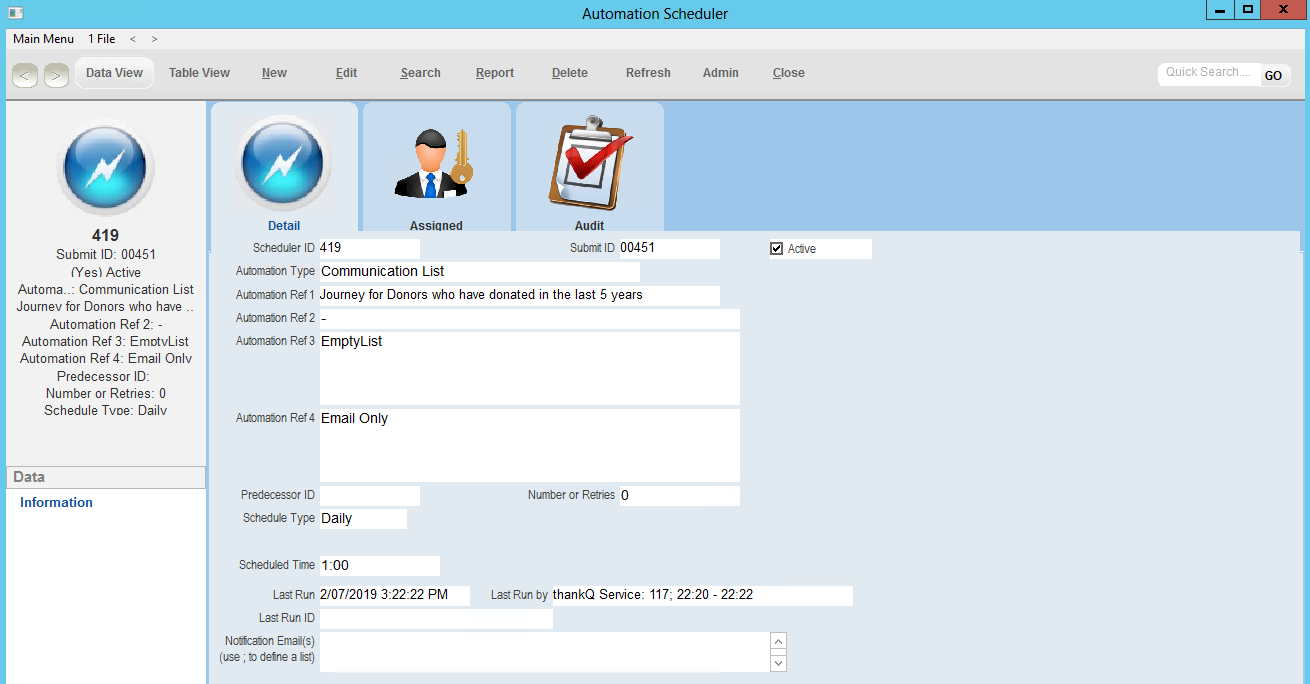
The Communication List that was setup can be found under Administration Automation Scheduler where it can be managed as well as the Communication List Automation. Refer to the section on Refresh and Resend if you need to send straight away and override the schedule settings.
Once the List has run you can login to Campaign Monitor and start designing your Journey.
Hint: Edit the automation to untick the tick box beside Active while you are designing the journey. The power search in the automation will require changing once you have the journey completed and once activated the list of contacts will be sent to the journey.