thankQ Help
The following are the steps to import new contacts with one than one address into thankQ.
A spreadsheet is required with a supporter id number to link the contact and their additional addresses. If these were existing contacts their serial numbers should be used instead of the supporter id you create.
The first sheet consists of the contact details.

The second sheet consists of the additional address details. Make sure that the Supporter IDs match in both spreadsheets.

1.Click Create on the tool bar of the Data Import form.
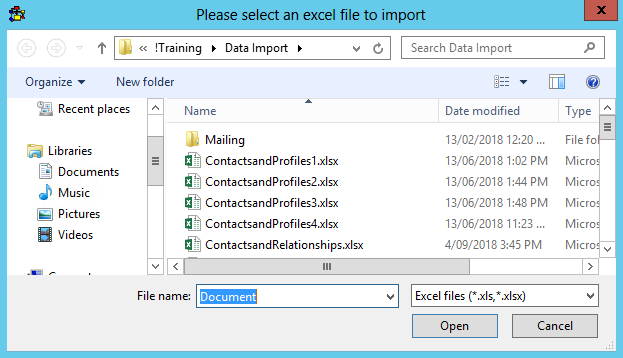
2.Click the ellipse on the Excel Input File line.

3.Locate and select the import file.
4.Verify that the fields in both sheets are correctly mapped in thankQ.


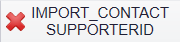
5.If either sheet has any column marked with a Red X, double click on it to map it to the column in the thankQ Database.
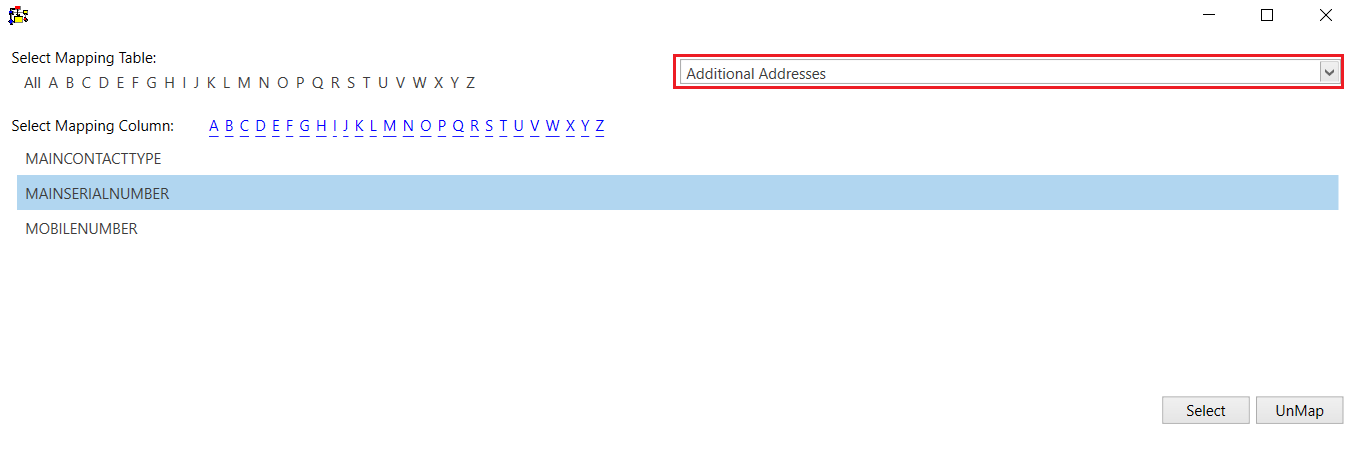
Note that in Additional Addresses the serial number is called MAINSERIALNUMBER, which references which contact this address belongs to.
6.Once you have finished mapping as shown above enter an Import Description.
7.Select the Default Configuration or a New Configuration, if applicable.
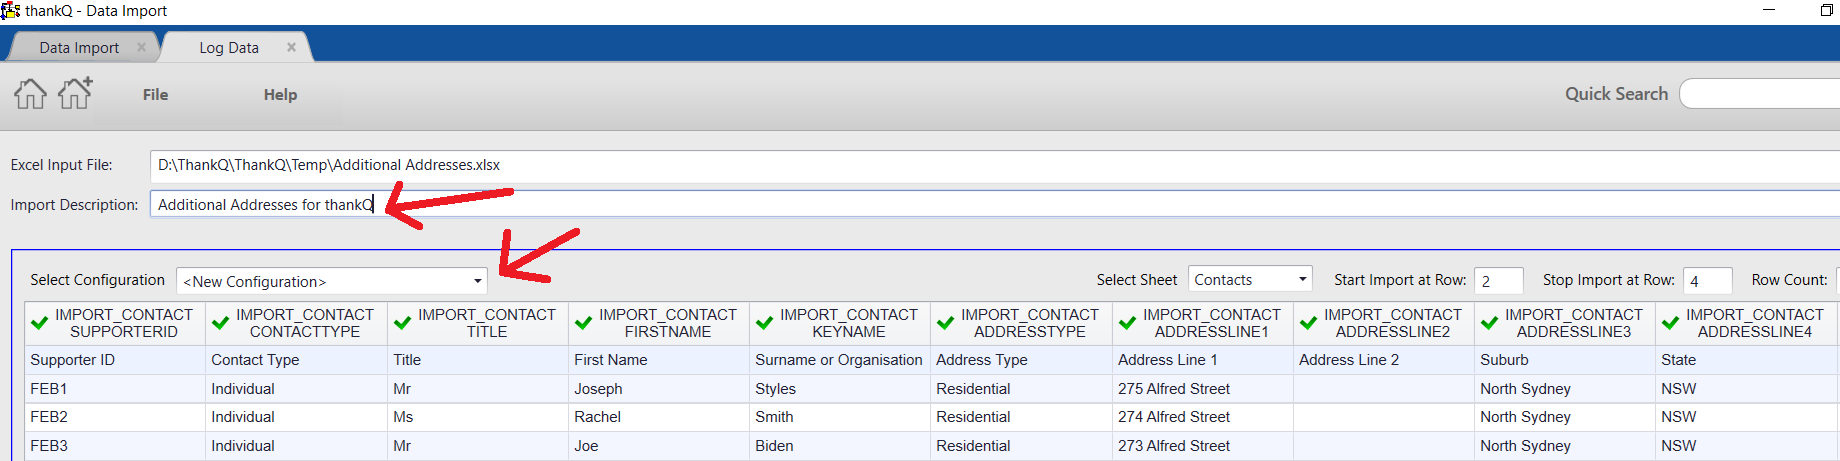
8.Click Log Data at the bottom right.

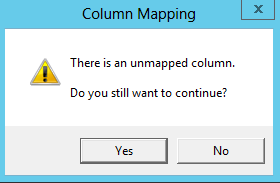
9.Click Yes if this message appears and you can proceed with unmapped fields.
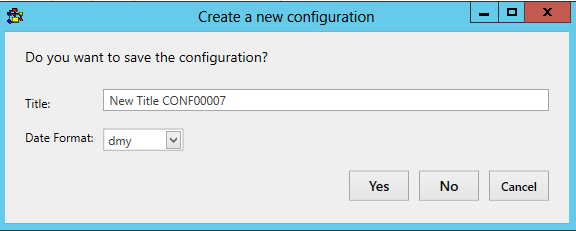
10.Click Yes to save the configuration or No to continue.
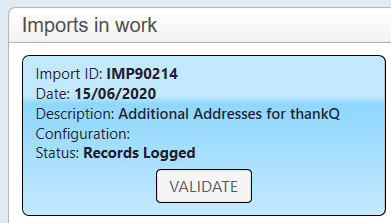
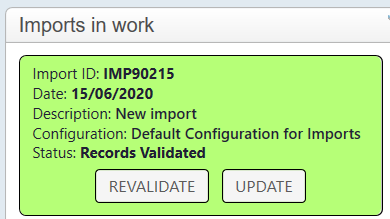
11.Click Validate on the import under Imports in work.
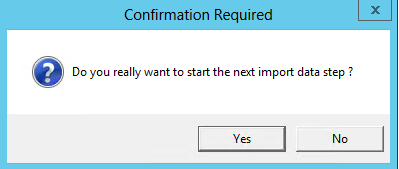
12.Click Yes to continue.
13.Click Update if there are no suspect duplicates or validation errors.
14.Click Yes to continue.
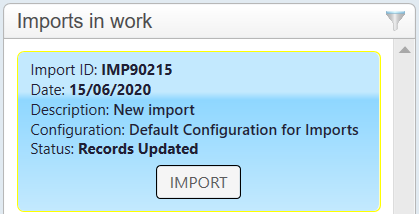
15.Click Import.
16.Click Yes to continue.
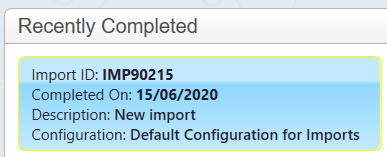
17. If there are no errors the import can be found under the Recently Completed window.