thankQ Help
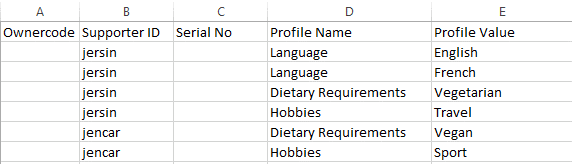
If a new contact has several profiles these need to be on a separate excel sheet and the contact is required to have a supporter id if they do not exist in the system so the import can match the contact and profiles. If the contact is already in the system and the serial number is known this should be used instead of the supporter id. The supporter id could be a combination of their name or an alpha numerical number.
If your organisation uses ownercodes for confidentiality these should be entered.
Sheet 1

Sheet 2
1.Click Create on the tool bar of the Data Import form

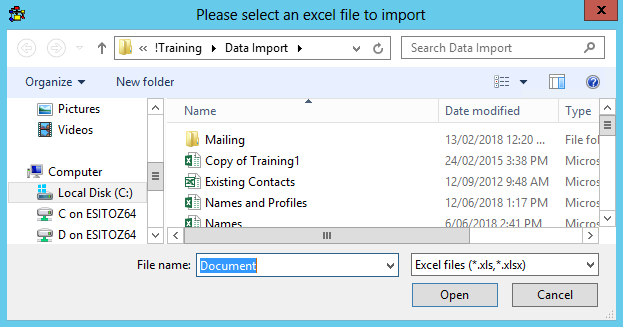
2.Click the elipse at the end of Excel Input File:

3.Locate and select the import
4.Enter an Import Description
5.Select a Configuration from the drop down if using a template
The internal Supporter ID field will automatically map as long as the spreadsheet has those words.

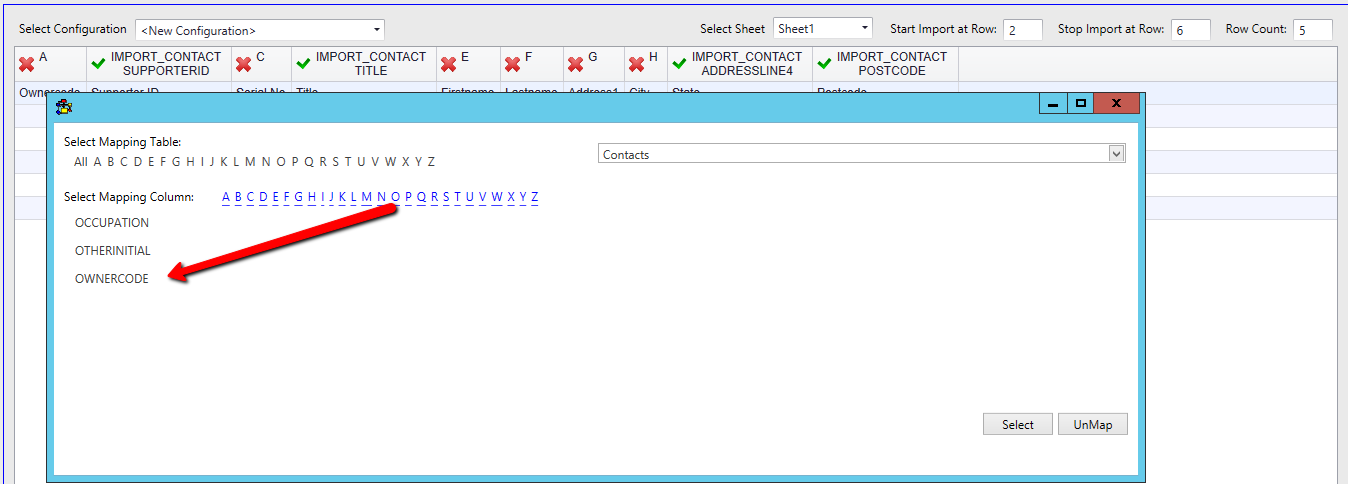
6.Double click on the A cell above Ownercode so this can be mapped to the thankQ field
7.Select Contacts from the drop so these fields are accessible
8.Click on O on the Select Mapping Column row
9.Double click on Ownercode
10.Double click on C Cell above Serial No
11.Click on S and double click SerialNumber to select
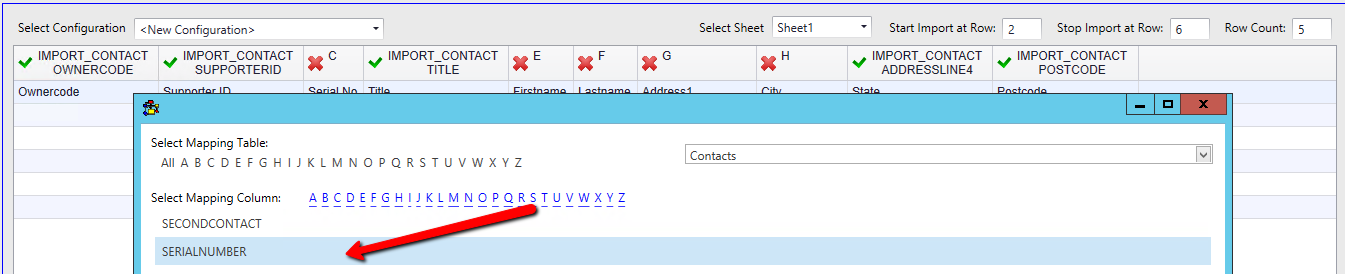
12.Repeat and map all fields
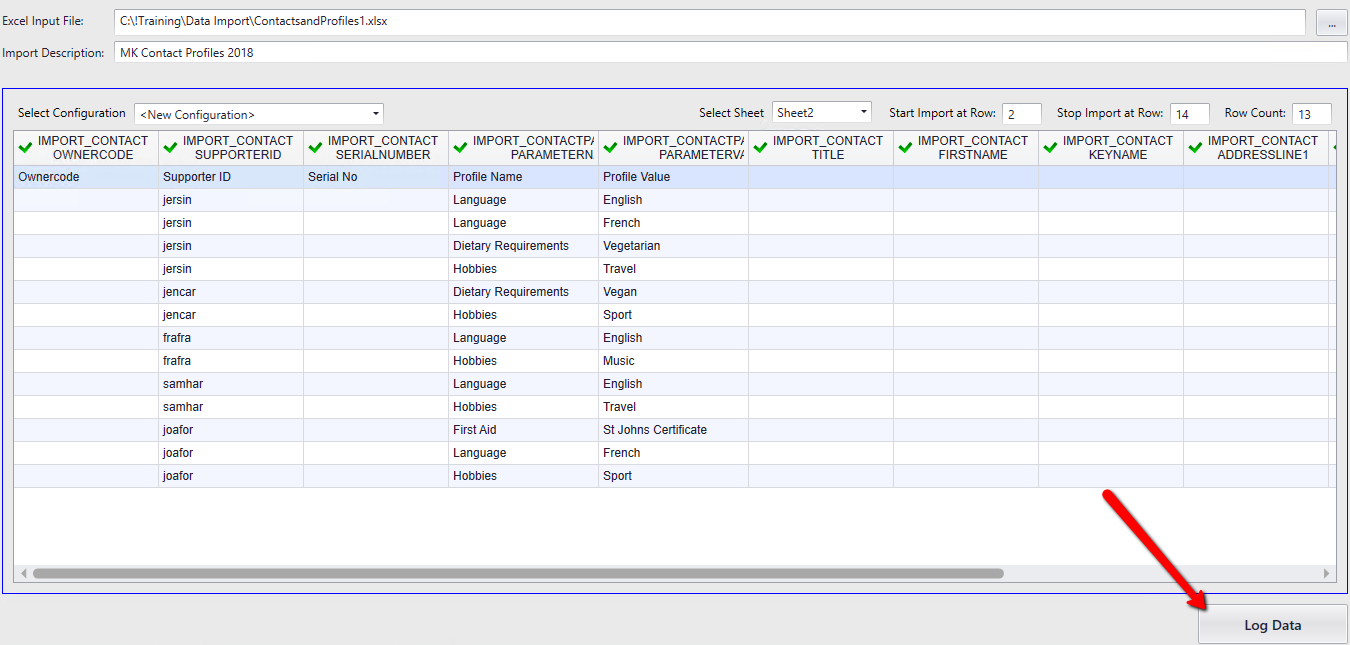
13.Select Sheet 2 from the drop down beside Select Sheet

14.Map the fields that have x’s
15.Click Log Data
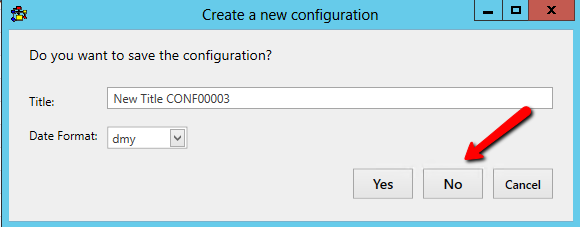
16.Click No if you do not want to save the configuration or Yes if you do
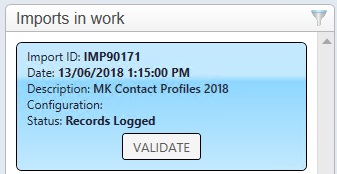
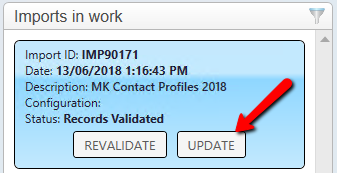
17.Click Validate on the import in the Imports in work window
18.Click Yes to confirm
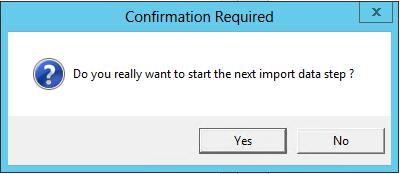
19.Click Update
20.Click Yes to confirm
21.Double click on the import if you want to view the information

22.Click the x on the Import View tab to close
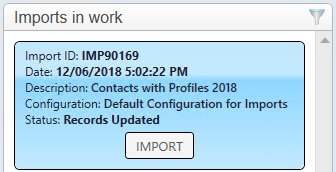
23.Click Import
24.Click Yes to confirm
If there are no errors the import can be found under the Recently Completed window

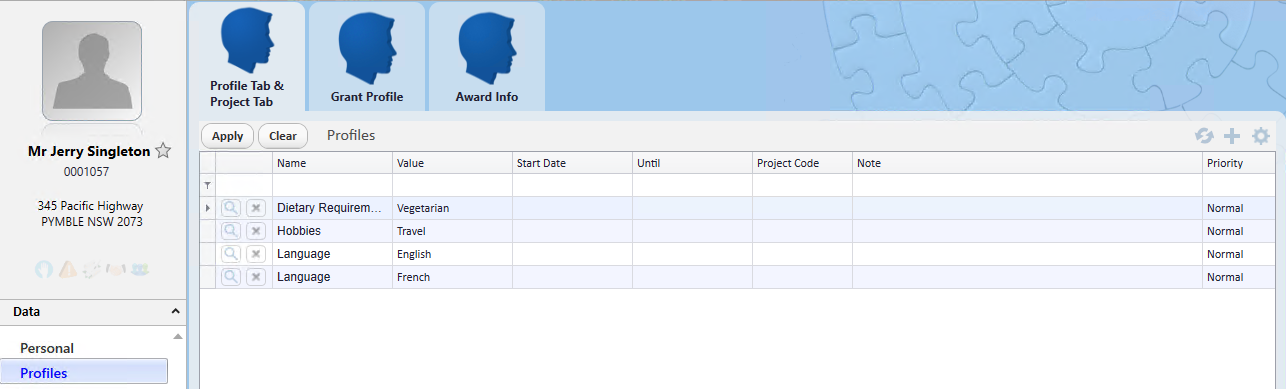
Example of an imported contact