thankQ Help
The Receipt Page Mapper contains a number of different ways that separate confirmation pages can be sent to users. Using the mapper a user could get a different confirmation page depending on:
- The Type of payment such as a Membership, Event Ticket, Donation, etc. This may include the selection of specific pages with those payments types, for example All Memberships or All Gold/Platinum Memberships.
- The Payment or Donation Amount.
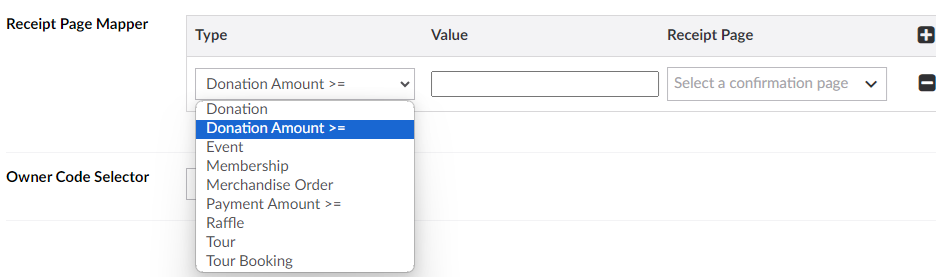
To use these options first add a new entry by selecting the + icon:

Select the page type you want, for example Select the Donation Amount:
Then set the Donation Amount to be above the number you want and then add the Confirmation Page that will be sent if a user payments more then that amount:
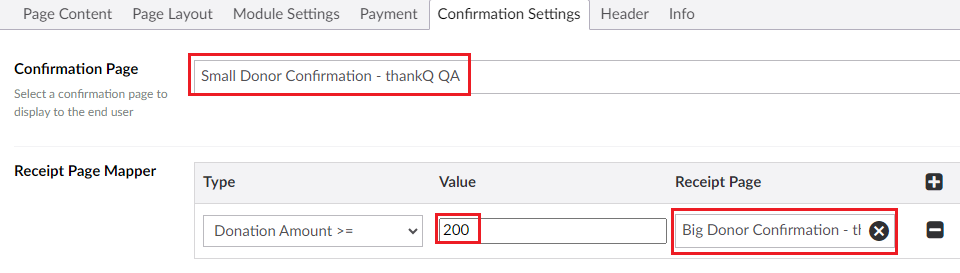
Note: Any donation below 200 in this example will get the default confirmation page (Small Donor Confirmation).
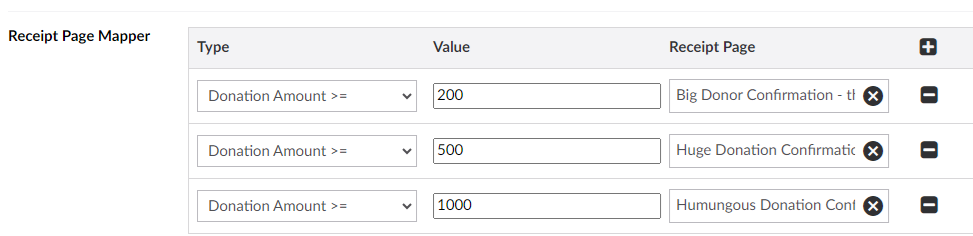
You can also add other combinations as well to create confirmations for different levels such as a Small, Medium, Large, VIP Donation:
Please note that you should make sure that the Donation/Payment choice is correct as well:
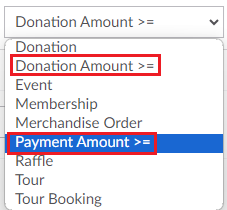
A Donation refers to any payment of money that is not being made in exchange for anything, while a Payment is when the user is getting something from that payment, for example a Membership, Event, Raffle Ticket, Tour, etc will all count as payments and not donations. If you are using any of those modules then make sure you are using Payment Amount >= so that any payment above a certain threshold will receive a particular confirmation page (for example someone who buys more than $200 worth of Raffle Tickets).
--
You can also set the confirmation page based on the Donation's Source Code, to do this select Donation from the dropdown and then select the Source Code as the value. Every time that Source Code is selected and paid for the user will receive the confirmation page you selected.

--
For more information on how to use the Receipt Mapper Page for Memberships, Events, etc you will need to go the respective Confirmation Settings Page for that module. For example for Events you will need to look at the Event Confirmation Settings page.