thankQ Help
When importing new payments into thankQ the default behavior is for all payments to be added to be added to a single batch. There are two exceptions to this rule:
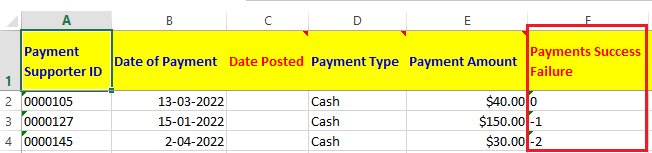
- Payments are always split into different batches based on the payment success status (Successful, Failed, Pending or not Processed).
- If payments are being imported into existing batches and those Batch IDs are specified.
However if you do want to split the batches of new payments based on the payment details then it is possible to configure the lookup values in thankQ to do this.
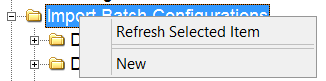
1. Open the Import Batch Configurations folder in Lookup Values.

2. Open the folder for whichever criteria you would like to differentiate your batches on. A brief description of each criteria is shown below:
a. Batch Type - sets the Batch Type when the import is created.
| b. | Credit Card Types - Set as All if the payment is by a method other than the Credit Card Type (or if you don't care what the credit card type is). Otherwise you can make different batches based on the type. |
| c. | Date of Payment - Set as No if you don't want any splits based on dates, otherwise payments will go into different batches based on the date. |
| d. | Gateways - If you have multiple gateways in the same import you can separate the batches based on which one the payment has been made to. Set as All if you don't want these to separated based no gateway. |
e. Include Current Date In Description - If set to Yes this will add the date of the import to the batch description.
f. Payment Frequency - Allows you to override the default settings for splitting into different batches based on Payment or Pledge Frequency. Set to All for default behaviour.
| g. | Payment Status - Allows you to override the default settings for splitting into different batches based on status. Set to All for the default behaviour. |
h. Payment Type - Set this option if you want to split based on the payment type. Set to All if you don't care about this.
i. Source Code - Set this option if you want to split based on the Source Code of the payment. Set to No if you don't care.
| j. | Types of Payments - This will split the batches based on which module in thankQ this payment is for such as Raffles, Orders, Donations, Memberships, etc. Set to All if you don't care what the type is. |
3. For multiple different criteria you will need to add an extra folder by selecting New.
4. An example of what criteria you can use is the following:
Folder Name: Visa Memberships
Batch Type - General
Credit Cards Types - Visa
Date of Payment - No
Gateways - All
Include Current Date In Description - Yes
Payment Status - Ok
Source Code - Yes
Payment Type - Credit Card
Types of Payments - Membership
Folder Name: MasterCard Donations
Batch Type - General
Credit Cards Types - MasterCard
Date of Payment - Yes
Gateways - All
Include Current Date In Description - No
Payment Status - Ok
Source Code - No
Payment Type - Credit Card
Types of Payments - Donation
In the above example let's say you import 4 payments, one of them meets the criteria in Visa Memberships and the other in MasterCard Donations while the remaining two payments don't meet the above criteria.
What will happen after the import is that 3 batches will be created, the first two batches will be named as the following (with the desription adjusted based on whether you included the Source Code, Current Date or Date of Payment):
Visa Memberships on {Source Code} - {Import Date}
MasterCard Doantions on {Payment Date}
The remaining two payments will be added to the same batch with the normal batch description of:
Imported from {ImportID}