thankQ Help
Profiles are used to capture information such as interests and other information that your organisation requires to be able to look after them in a professional manner.
Any profiles that are setup must already be in thankQ so they can be mapped when the information is downloaded.
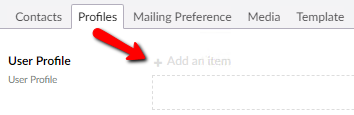
1.Click on the Profiles tab
2.Click on the + Add an item
3.Enter a Label name to describe the profile – this could be a question
4.Tick the tick box beside Mandatory if this information is a requirement

5.Select a Location from the drop down e.g. Section 3. Section 1 is the Name and Contact information and Section 2 and 3 can be used for Profile and Mailing Preferences.
6.Select a Type from the drop down, whether it be a Textbox | Checkbox | Hidden or Dropdown

7.Select a Destination from the drop down, whether this is a Profile Name or Profile Value
8.Enter the Profile Name as it is in thankQ
9.Enter the Profile Value if you want to have a value in the text box as a default

10.Click Save and publish
11.Click the + at the right to add any more profiles

12.Repeat the steps above to add the required profiles and types