thankQ Help
When a class finishes for a given year the students will need to be Rolled Over to the next class for the next year, for example American History Year 1 in the year 2017 will need to have the students rolled over to the class involving the subject American History Year 2 in the year 2018. The guide below walks through the steps to roll over a single class. Rolling over multiple classes at the same time uses the same process, perform a search to find all the Classes that are to be rolled over, then follow the steps below except when the menu options specifically states (this Class) select the same menu option but for (this Selection).
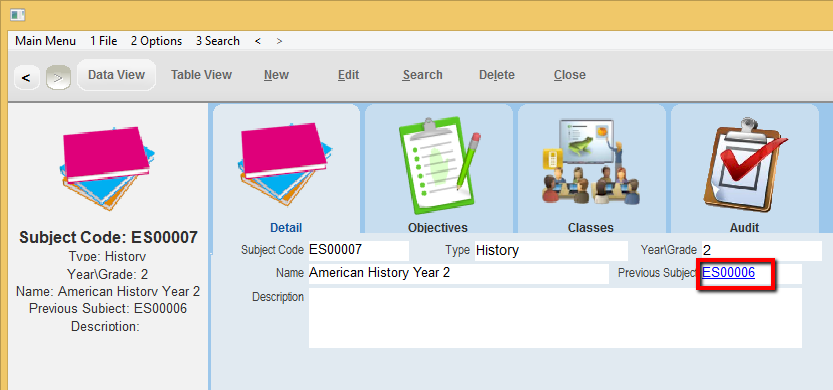
1.Ensure that the latest subject is linked to the previous subject, for example American History Year 2 should have American History Year 1 as its previous subject.
2.For every class that is to be rolled over (the first class): a class in the following year, for the next subject, and at the same school will need to already exist (the second class). If the second class doesn’t exist, it will need to be created.
The First Class
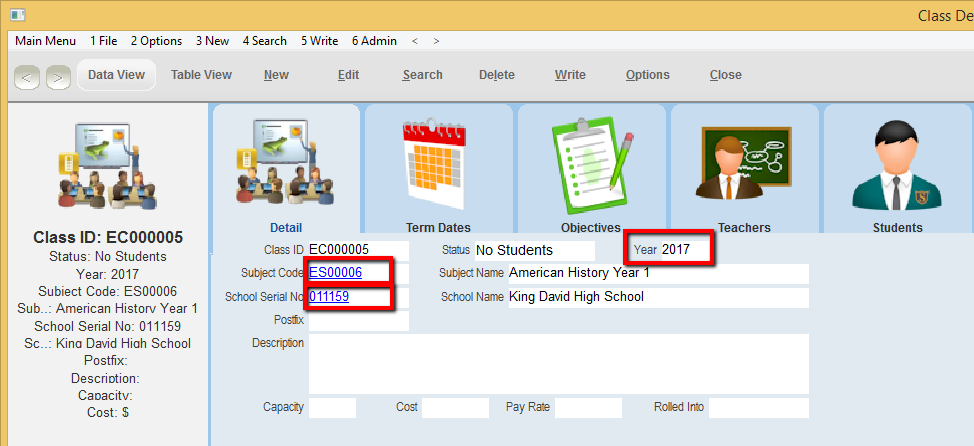
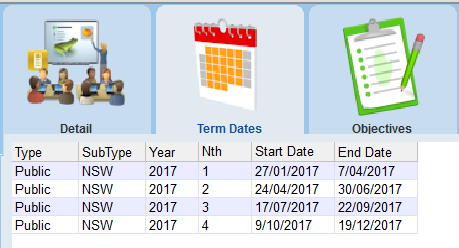
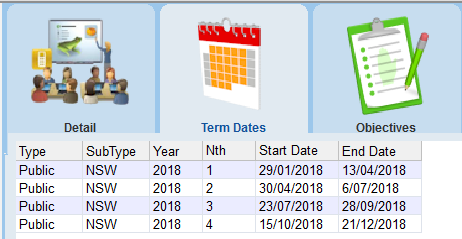
You will also need to set the Term Dates to match the current year
The Second Class
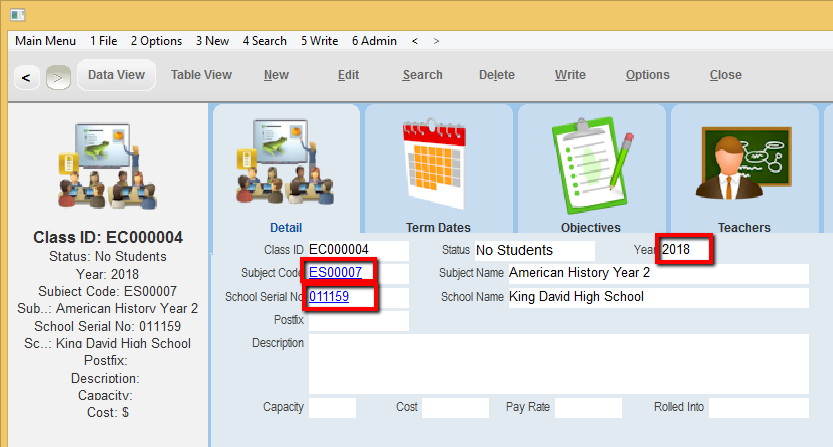
You will also need to set the Term Dates to match the next year
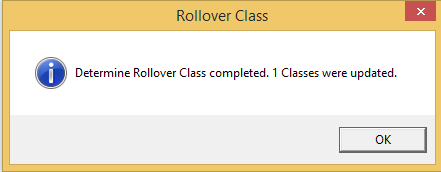
3.Go to the first class and then click on the Admin dropdown menu at the top of the form and select Determine Rollover Class (This Class)

4.A dialogue box should appear asking if you wish to continue. Click Yes

5.Another dialouge box will appear informing you that 1 or more classes have been changed (0 Classes being changed indicates that the operation has failed)
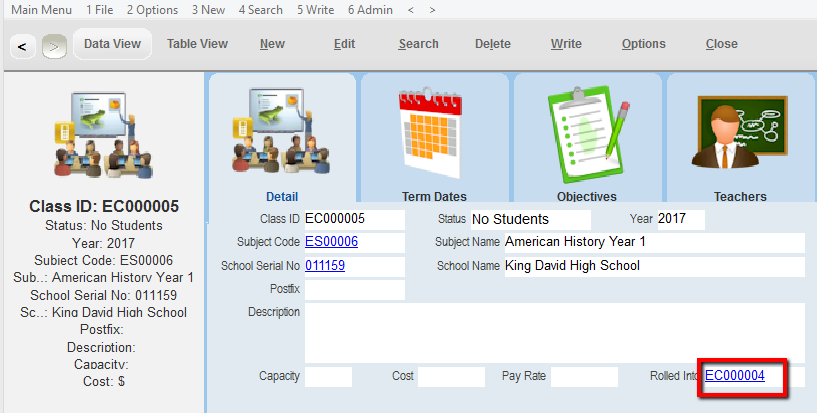
6.On the form the Rolled Into ID should now point to the Class ID you wish to roll the current students into. Click on the link or search for the Class ID listed to ensure it is the correct one. If it failed to place a Class ID into this field or if it needs to be manually configured, edit the Class, and use the Class lookup to select the Class the first class is to roll into. All currently selected Classes can be updated to roll into a single class by using Global Update – Rolled Into.
First Class
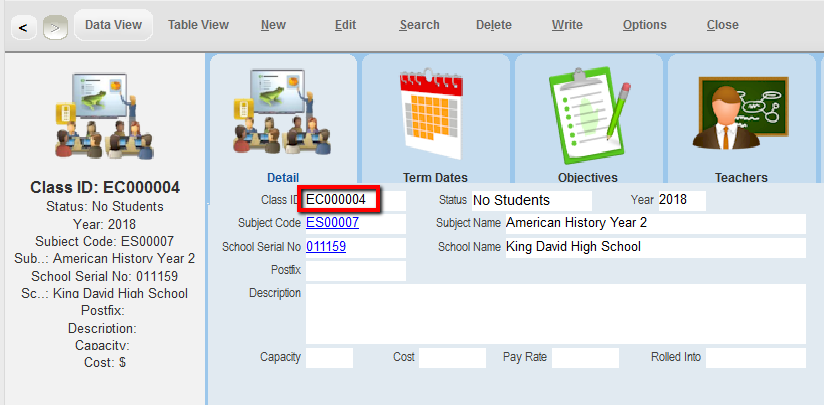
Second Class
7.Go back to the first class and then click on the Admin dropdown menu at the top of the form and select Rollover Students (This Class)
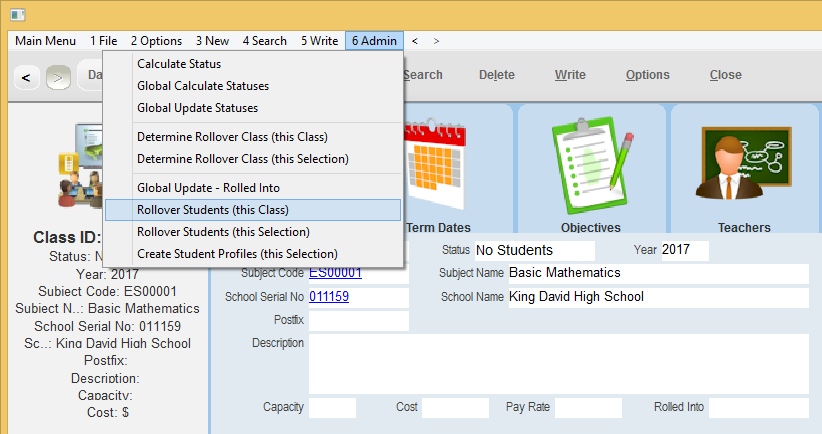
8.A dialogue box should appear asking if you wish to continue, click Yes

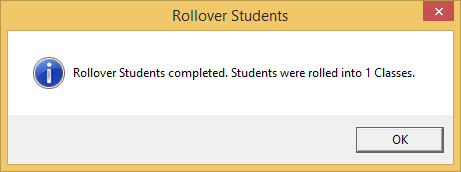
9.Another dialogue box will appear informing you that 1 or more classes have been changed (0 Classes being changed indicates that the operation has failed)
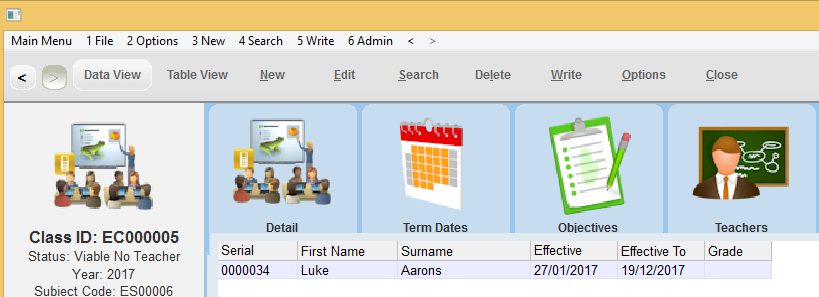
10.To verify that the rollover was successful view the students in the Second Class and see if they match the Students in the First Class. Note: If a student’s enrolment Effective To date is before the date of the Last Day of the Last Term then that student will not be rolled over to the next year’s class.
First Class
Second Class

The Rollover will enter the following information into the Second Class
•A list of students that will attend the second class
•Each student will be attached to a Timetable in the second class that will allow marking for attendance.
•A field called Objective Results will be placed under each student’s enrolment record if the Second Class had any Class Objectives.