thankQ Help
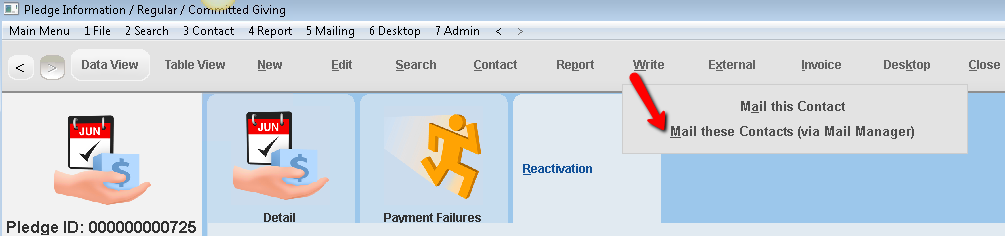
1.Click Write on the tool bar
2.Select Mail these Contacts (via Mail Manager)
3.Click Yes to the message indicating how many contacts to load
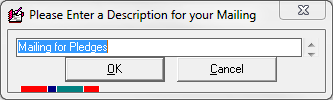
4.Enter a Description for the mailing, click OK
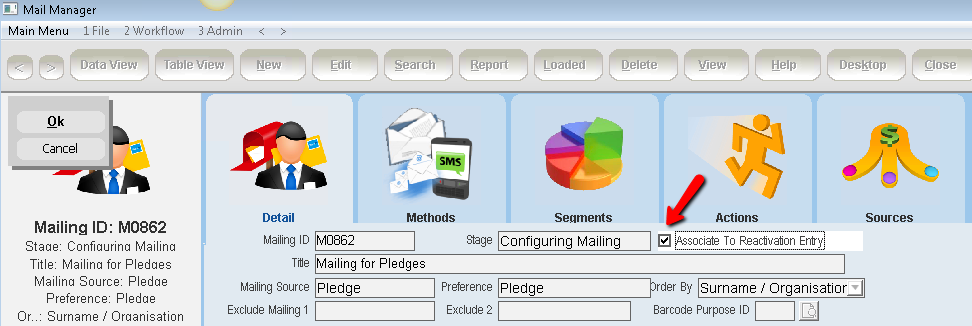
5.Click OK to accept Pledge as the mailing preference
6.Click the Edit button to open the Mailing
7.Click into the tick box beside Associate to Reactivation Entry
8.Click OK to save
9.Click on Merge Options workflow option
10.Select the appropriate icon to send this communication eg Merge to Word
11.Print, Exit and Log into thankQ
12.Double click on Log as Sent from the workflow window
13.Enter a date or click OK to accept the date
If you use Categories to categorise your communications you could select Pledge as a category. If you do not have this category the thankQ Administrator can add this under Lookup Values
14.Click No to select a Category
Example of the Communication tab with and without using Categories. Categories can help locate the “same type” of mailings.
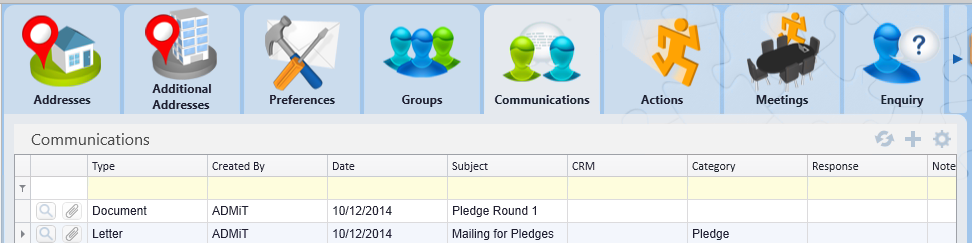
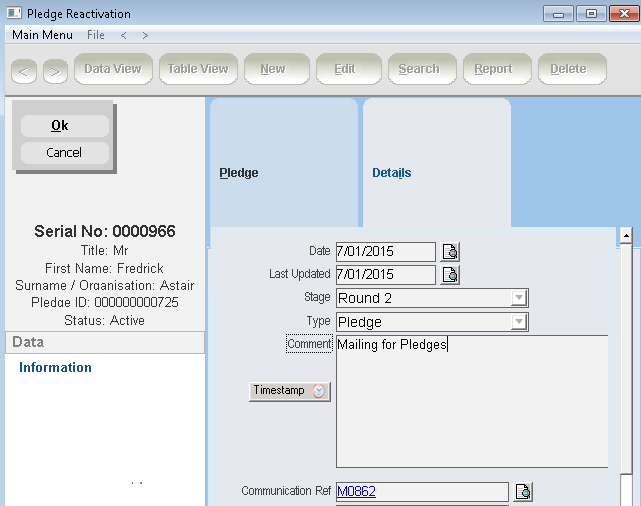
Once a mailing has been completed a reference to this can be found under the Communication tab of the contact as above and also under the Reactivation tab of the Pledge.
The reference under the Reactivation tab of the Pledge defaults to the first stage and will require editing to update the details .
15.Double click on the mailing to open or right click and select View Reactivation Entry
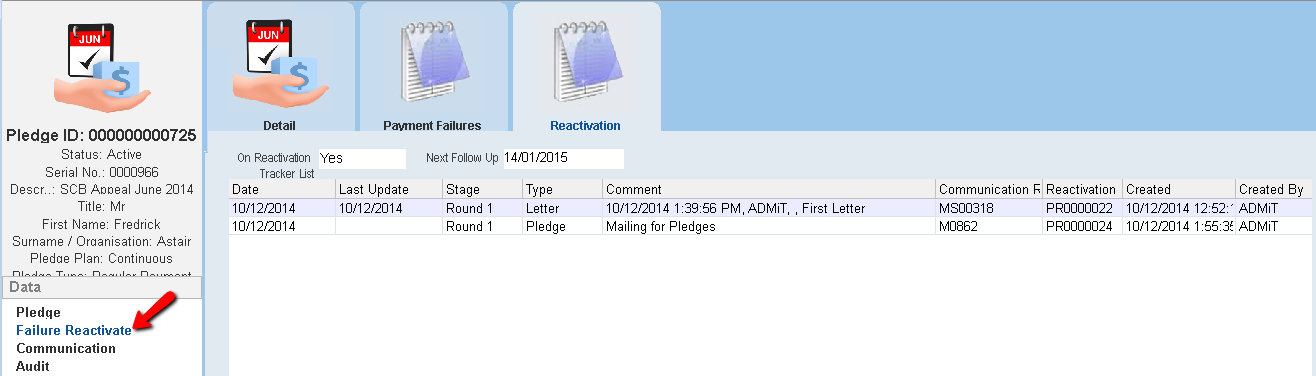
16.Click the Edit button
17.Make relevant updates eg Last Update, Stage, Comments
18.Click OK to save