thankQ Help
1.Perform a Search and select Power Report. The Power Report will capture the search information so when the report is run in the future the search criteria will be run also.

OR
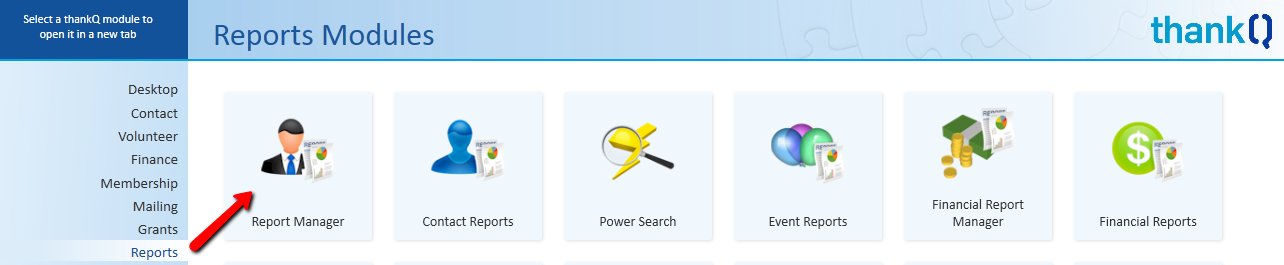
Select Report Manager from the Reports module from the Main Menu. If a power search or filter criteria is not selected when creating Power Reports from the Report Manager, the report will be run on the whole database.
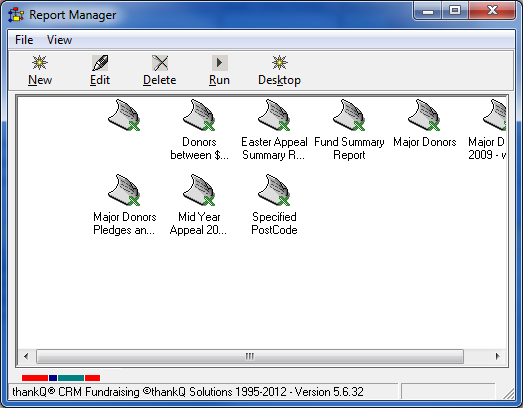
2.The Power Manager window will be displayed. All previously saved Power Reports will be shown here.
3.Click on the New button.
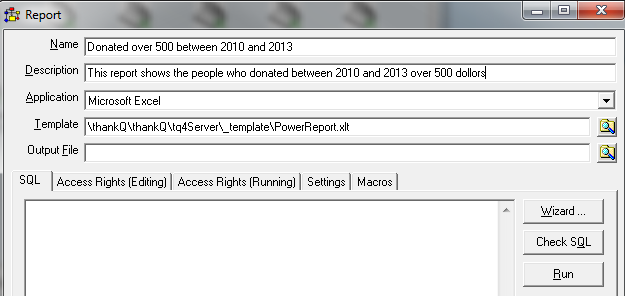
4.Enter a name for the report which is meaningful to you into the Name field. This is a mandatory field.
5.Enter a description of what the report does into the Description field. This is an optional field, but the more information you have on report the easier it is later to remember what it’s for.
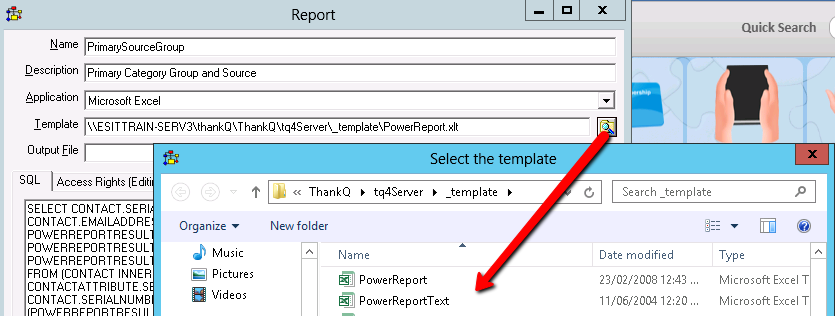
6.The Application and Template fields are already filled in for you.
To change the Template click on the Pick List and select the PowerReportText so the serial numbers are not truncated.
7.The Output field can be left blank.
8.Now click on the Wizard button. This assists you to construct the SQL Query to extract your information.
8.An SQL Wizard dialog box will open.
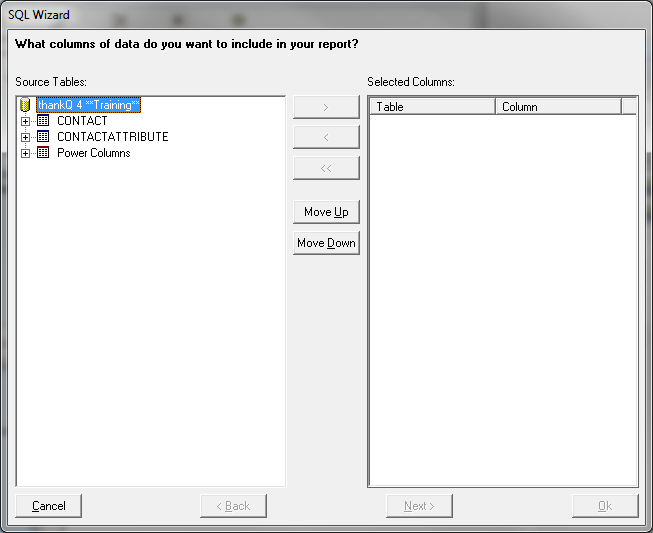
When you are searching for information in a database for a report or table you need rows and columns. The Power Search defines your rows, ie which contacts are to be reported on and the Power Report defines your columns, ie. What information about those contacts do you want to see?
From the SQL Wizard window you will select the columns of information about the contacts you have searched for.
There are two parts to this window: on the left are the columns you can select from, and once you have chosen your columns they will be shown on the right.
9.Start by expanding the Contact folder and by clicking once on the + beside each table name. A list of fields contained in the Contact table will be displayed. These fields come from the Form Key and Biographical tab fields on the Contact Details Form.
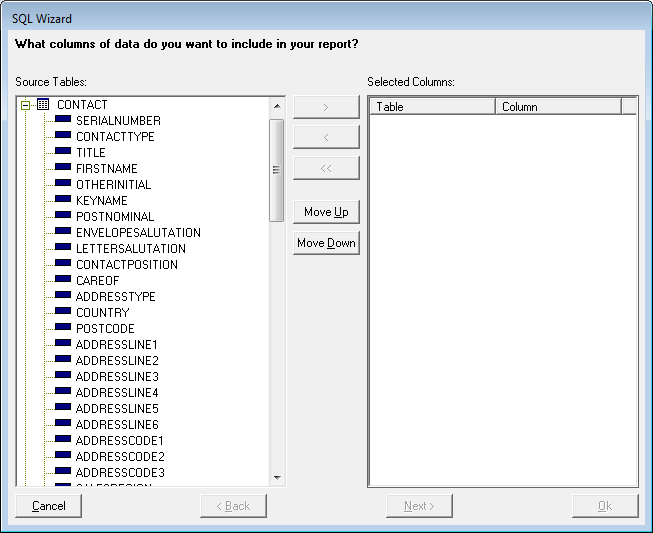
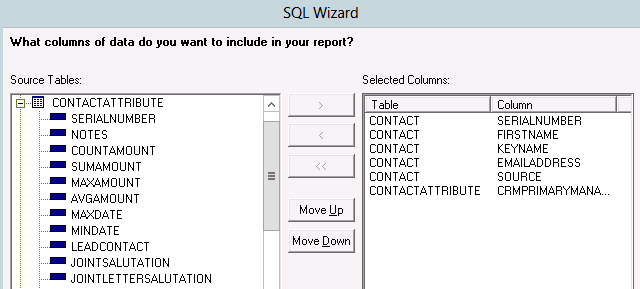
10.To select fields either double-click on the field, or click once on the field and then click on the > button. The field will be moved to the Selected Columns window.
11.Expand the Contact Attribute folder. The fields in this folder hold data within other tabs (not sublists) within the Contact Details Form. Select any relevant fields.
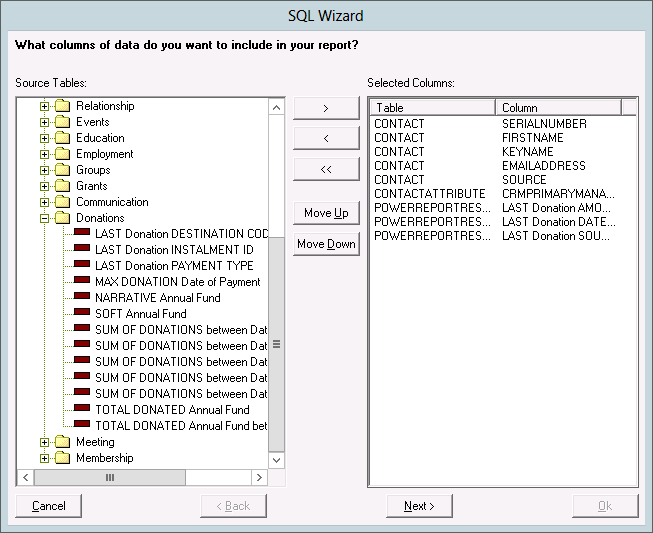
12.In the Power Columns folder there are sub-folders which represent the sublists on the Contact Details form. Expand these folders to access additional columns that are not available when using the Report or Report with Sublists option. The reason for using a Power Report is to include one or more of these columns.

13.Select the relevant Power Search columns according to your needs.
14.Once you have selected your columns you are able to change the order they will appear in Excel by clicking on the field in the Selected Columns window and clicking on the Move Up or Move Down buttons.
15.Once you are happy that you have selected all the columns click on the Next button.
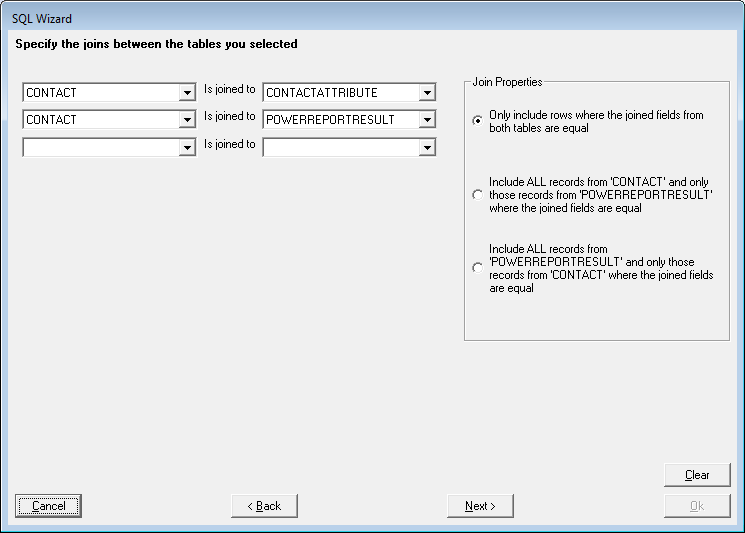
16.If you have only selected fields from two tables this join fields will already be filled in for you and all you need to do is click on the Next button.
17.If you have selected fields from three tables you will need to join these tables so that the information can be extracted. For example, join CONTACT to CONTACTATTRIBUTE in the first line and join CONTACT to POWERREPORTRESULT in the second line. A third line of fields will be displayed but you do not have to enter any further information.
18.Click on the Next button.
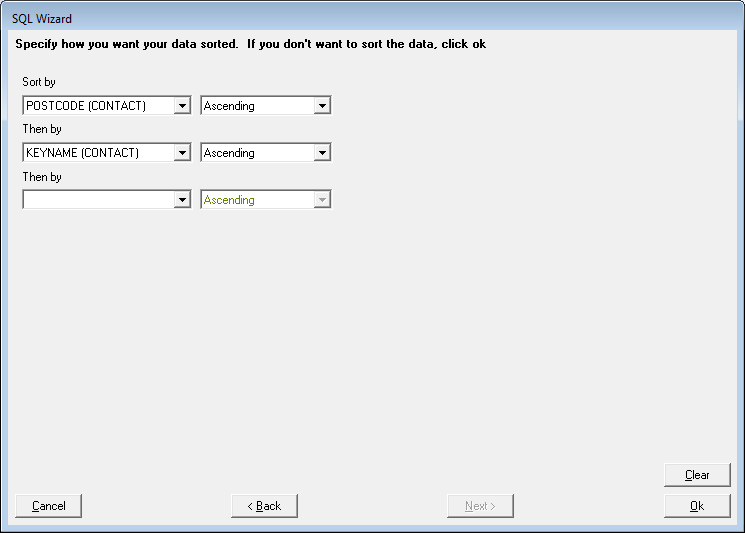
19.You are then taken to the sort selection screen. If you do not wish to sort the data at this stage click on the Ok button, otherwise, select the fields you wish to sort on. You can sort down to a number of levels if required.
The following screen will appear if you have activated Report Manager from the Report module as it allows you to attach a Power Search to the report. If a Power Search or Filtered Criteria is not selected the report will run over the whole database.
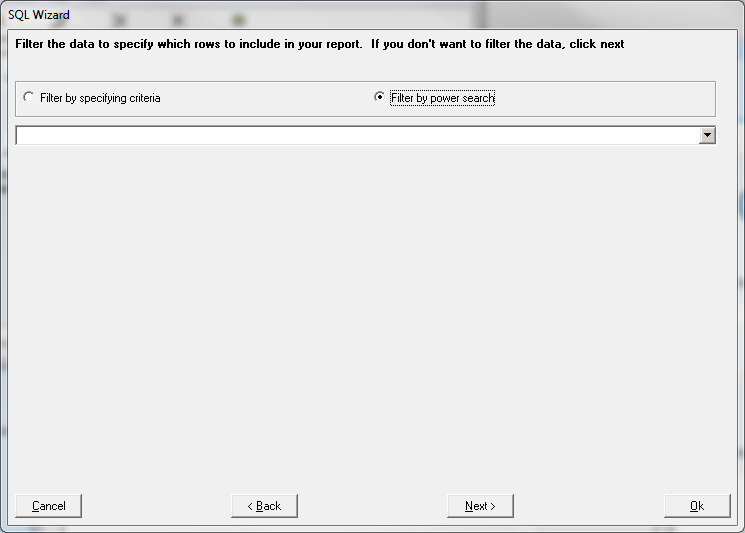
20.Click on the Ok button to proceed if above screen appears.
You will be returned to the Report setup window where your SQL Query is now displayed. You don’t need to understand the query, but if you click on the Check SQL button you can see if it is correct.
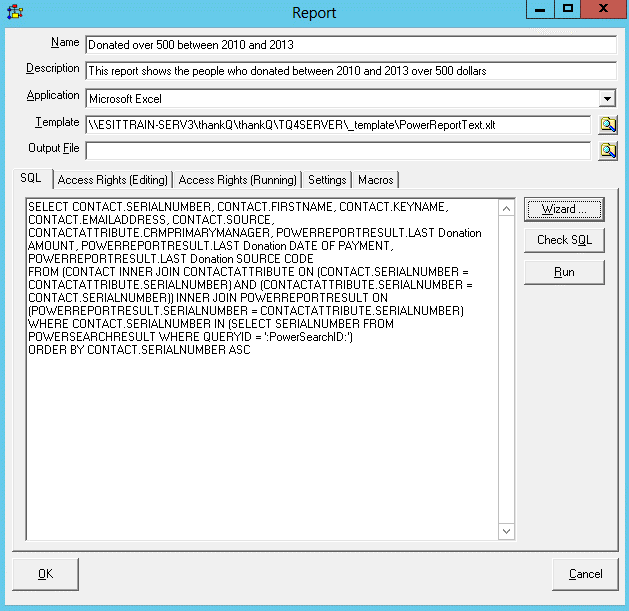
NOTE:
The SQL statement that is created may have an ADMIT name
This can be changed to

With the QueryID changed from the ADMIT name to PowerSearchID the Report can be run over any search
21.Click on Ok to save your report. Your report is now added to the Report Manager window. What you have created is actually a query to extract information; not a report as such.