thankQ Help
A template can be created using Admin>Create New Excel Load Template on the Batch Information form if required.
1.Click on the Finance module.
2.Click on Batch Information icon.

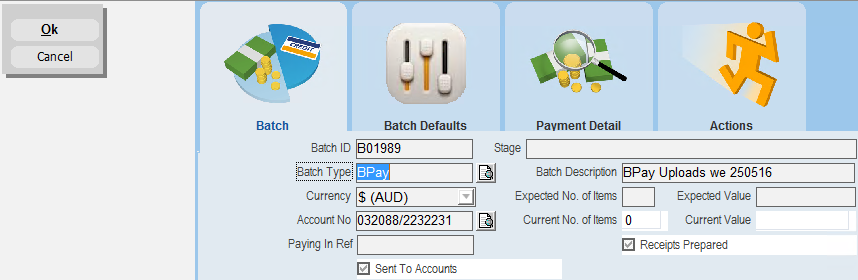
3.Click New on the tool bar.
4.Enter or Select BPay as the Batch Type.
5.Enter a Batch Description.
6.Select an Account.
7.Click OK.
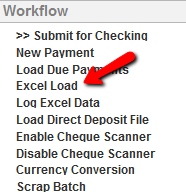
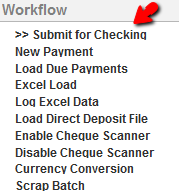
8.Click Excel Load in the Workflow window.
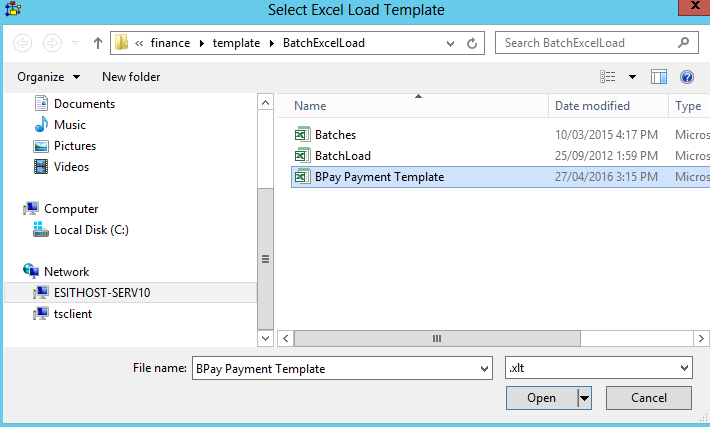
9.Select the template to use for this load.
10.Select the relevant fields, making sure the BPay Ref is added to this spreadsheet.
11.Copy and Paste the spreadsheet from the Bank Statement into this spreadsheet.
12.Click on line 5 to select the column headers.
|
•Not all the columns of the bank statement need to be selected for the import into thankQ. •Below are the mandatory fields required. •If this is to pay a Pledge the ID should be entered. •If the receipt number is supplied and you do not want to use thankQ’s this can be entered also. •Delete the line that has the Bank’s column headers so only the thankQ headers remain. |

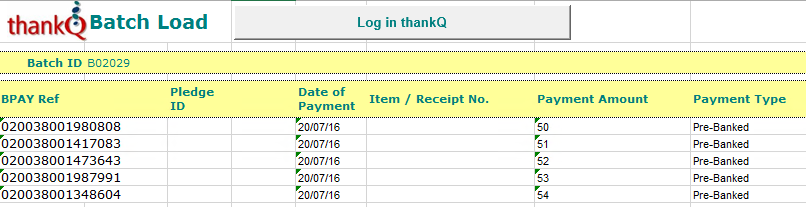
13.Click Log in thankQ button.
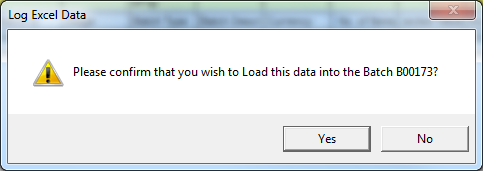
14.Click Yes to Message to load into the batch.
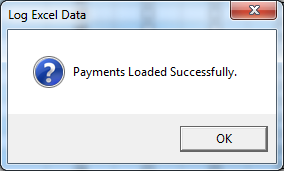
15.Click OK.
16.Click Submit for Checking under Workflow.
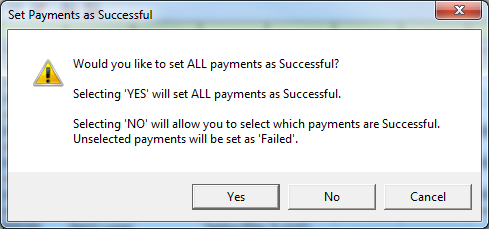
17.Click Set Payments as Successful.
18.Click Yes to set All payments as successful.
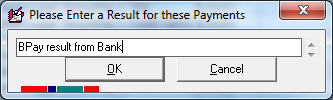
19.Enter a Result for these payments.
20.Click OK.
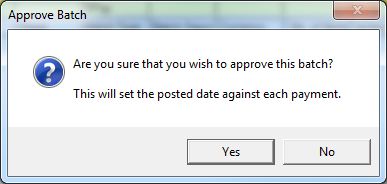
21.Click Approve Batch under Workflow.
22.Click Yes to confirm.
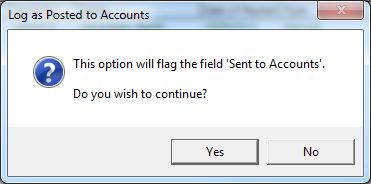
23.Click Log as Posted to Accounts under Workflow.
24.Click Yes to continue.