thankQ Help
The User Account Information form will open. The Username and Password fields have been populated with the information entered when adding a new user.
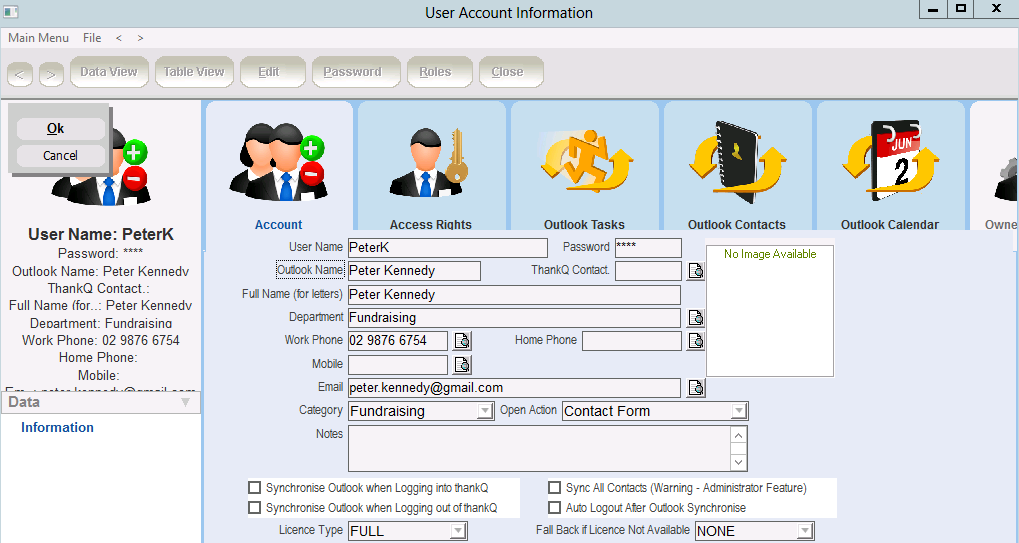
1.Click Edit
2.If the contact is already in the thankQ database their information can be selected by clicking on the pick list icon next to the ThankQ Contact field otherwise enter as much detail as possible
3.Enter the Outlook Name for this user. Type how this appears in Outlook
Note: Look under File>Options>General in Outlook to view how the name is setup
4.Select a Category to show which Team or State this user is from. These are lookup values that can be customised to suit your organisation
5.Select the Open Action drop list and select which the form will open
Open Action is not used at this time.
4.If your organisation has multiple licence types, select the relevant Licence Type for this user.
A fall backup licence can also be selected from the Fall Back if Licence Not Available dropdown list. When the user logs in, if all main licence types are in use, the fall back licence type will be used instead.
See table below for a description of each licence type.
Licence Type |
Description |
FULL |
Searching, Viewing, Creating and Editing rights to all thankQ functionality |
LIMITED WRITE |
Able to search and view information in all modules and create and edit data in core modules only eg. Contacts |
READ ONLY |
Can search and view information in all thankQ modules. Cannot create or edit records. |
5.Click OK
If a picture for the contact has already been loaded on the Contact form, it will now appear on the User Account Information form.