thankQ Help
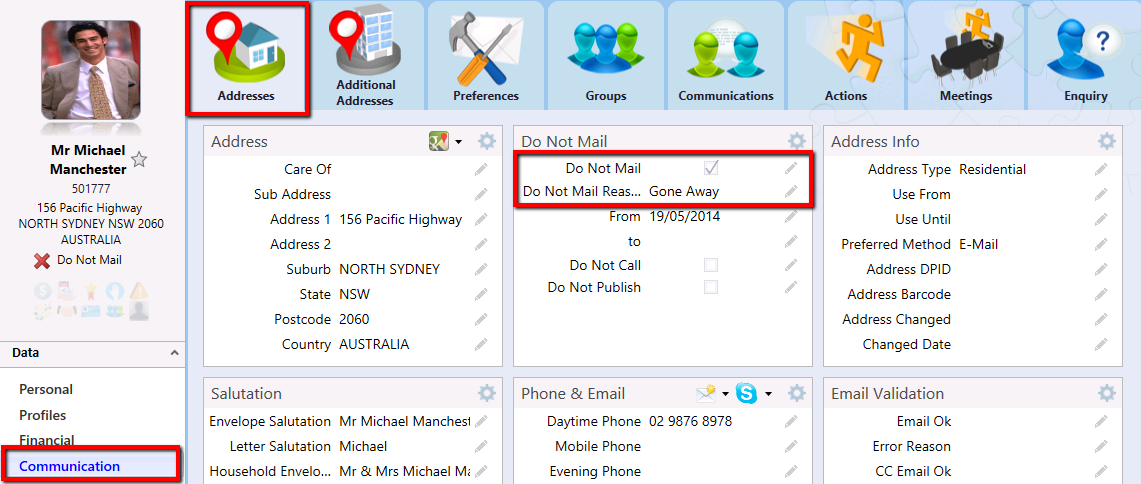
Setting Do Not Mail on a contact means do not send any emails or letters. Certain preferences can override this setting.
1.Click on the Addresses tab under the contact’s Communication module.
2.Click the Pencil beside Do Not Mail Reason.
3.Select a Reason from the drop down.
4.Click the Pencil to save.
|
The Do Not Mail tick box will automatically be populated X Do Not Mail will be indicated on the contact record on the left under the Address |

|
If the contact gives you a date of their return this can be entered into the “to” field. When this date becomes valid the contact will start to receive mail again. |
All Virtual Mailing Preferences will now show a grey cross to indicate that no further mailings will be sent and explicit preferences will have a red cross.
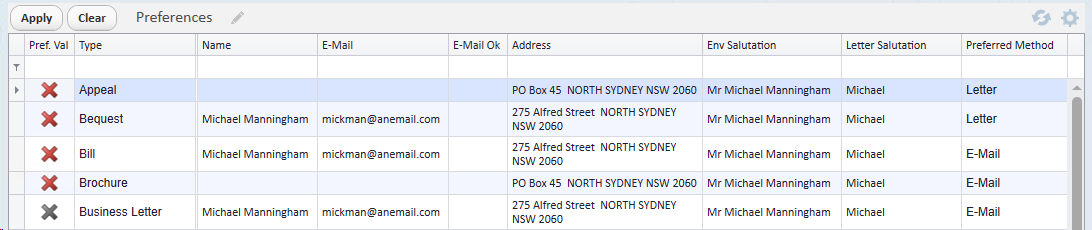
Your thankQ Administrator may set an exclusion in the Lookup Values to allow certain mailings (e.g. Receipts) to still be sent. If this is the case, a green tick will appear next to the relevant preference.
If you need to untick the Do Not Mail check box, the reason will be automatically reset and the until date will be set to yesterday’s date so that from today, they can be mailed again.