thankQ Help
There are two types of contact records, Individual and Organisation.
When creating records for a family or organisation, if the family members or employees are all using the same address, only the Head of the House requires an address on their record. The other members once related and are part of the same household can use the address of the Head.
The Head of House determines how the envelope salutation is created e.g. If the male was the Head of House the envelope would start with Mr if Titles are used, otherwise it would be the male’s first name. If the female was the Head of House the envelope salutation would start with Mrs or Ms.
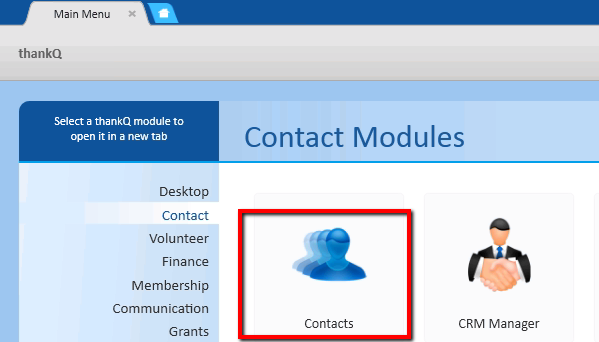
1.Click on the All Contacts button under the Contact module.
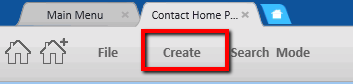
2.Click on Create on the Contact Home Page tab.
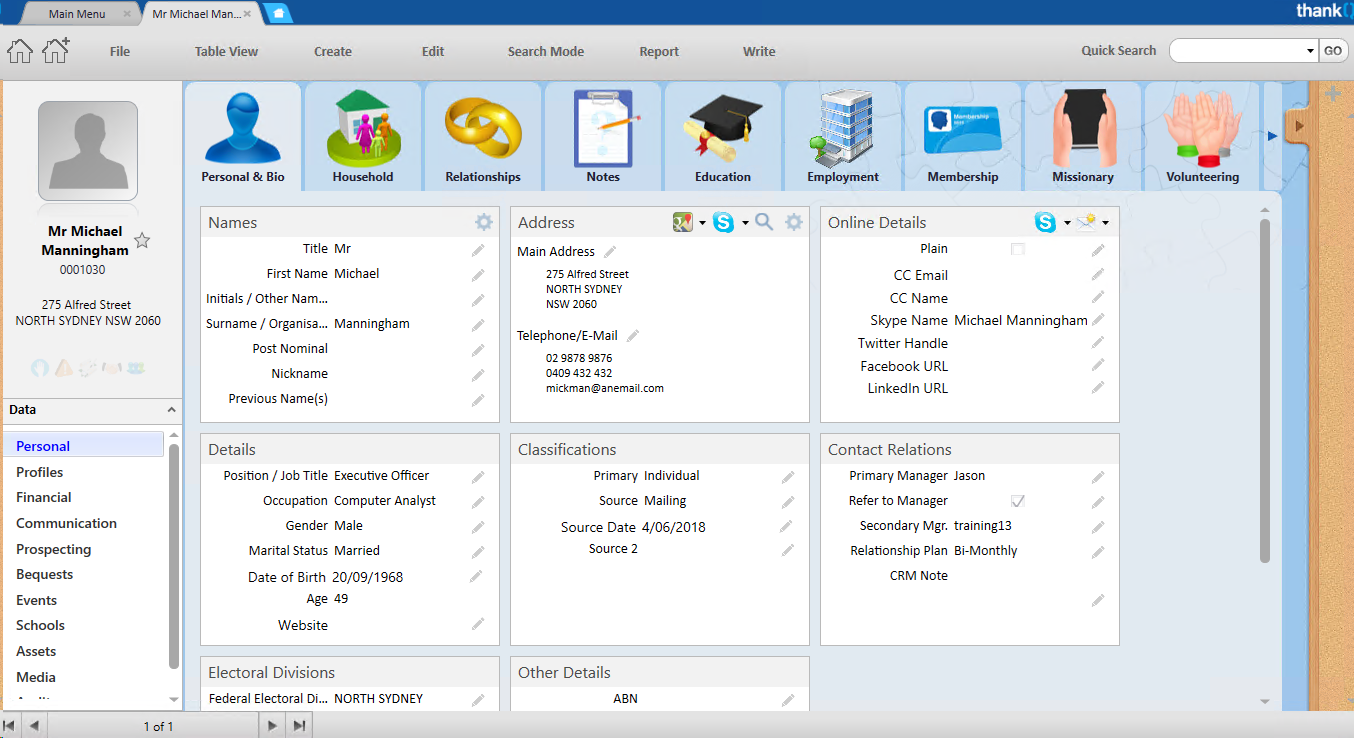
The contact form is broken into panels for Names, Addresses, Telephone Numbers, Details, Salutations, Preferences, Contact Source, Relationship Management, Electoral Divisions and Other Details.
3.Select the Type of contact e.g Individual or Organisation from the drop down.
4.Select the Title from the drop down.
5.Enter the First Name then press the tab key (thankQ is setup with Upper/Lower casing).
6.Enter Initials or Other Names and then press the tab key.
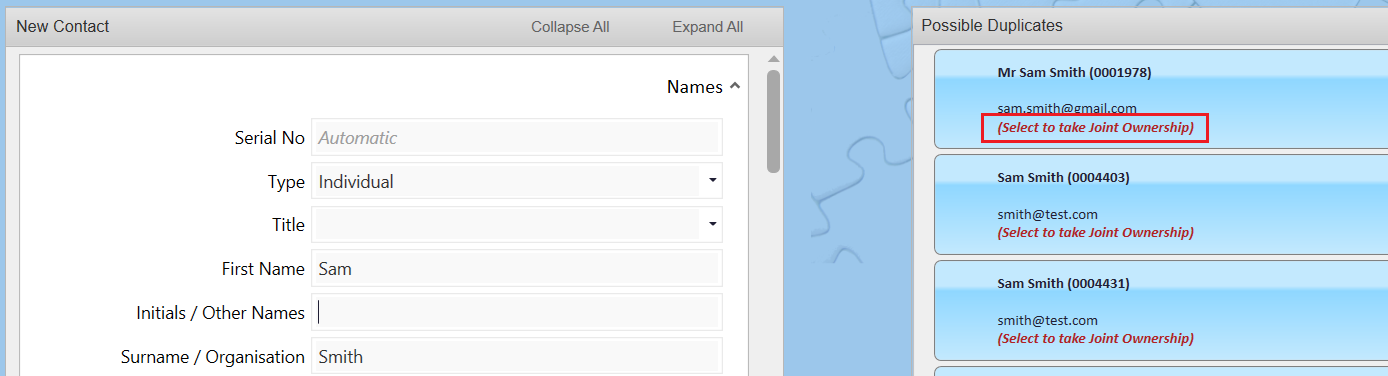
7.Enter the Surname or Organisation name then press the tab key.
| Once the tab key is pressed a list of possible duplicates will appear on the right. If there is a match click on the duplicate contact to select. |
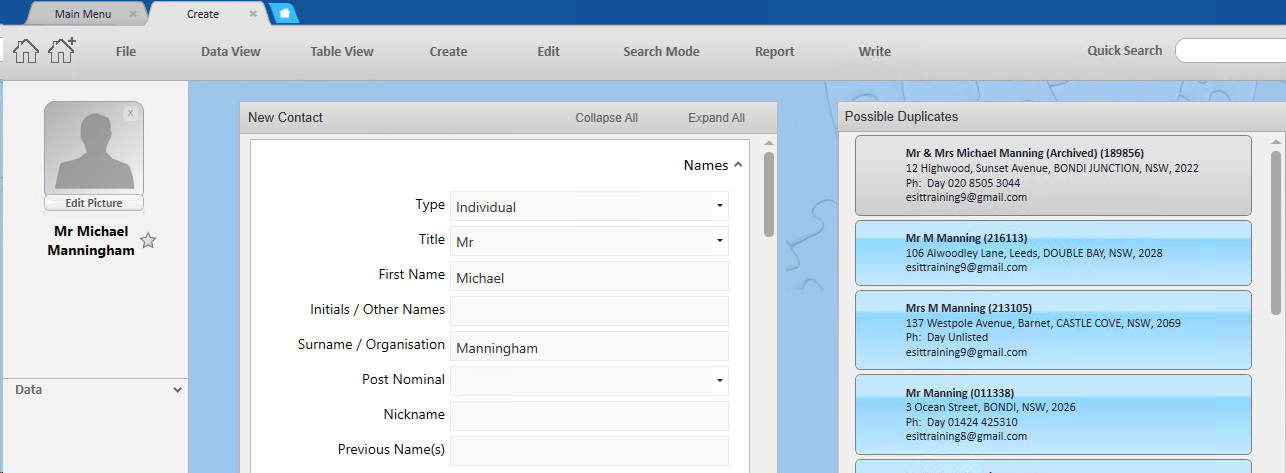
8.Note if you have the Ownercode feature enabled in thankQ and the Lookup Value Administration --> Ownercode Dedupe - Allow Taking of Ownership then you will be able to change the Ownercodes of any records that have been matched.
 |
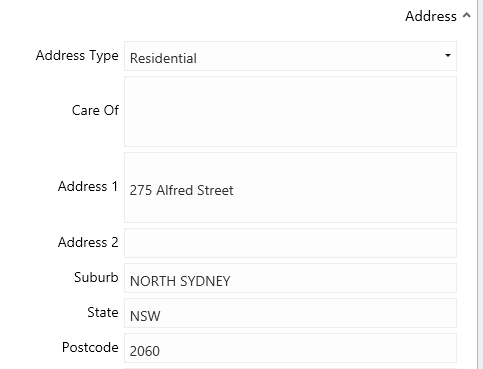
9.On the Address Lookup panel if you do not have Postcode Lookup software enter the Street address.
10.Start typing the Suburb, thankQ will display some possible choices, select the correct one and this information will populate the fields in the Address panel below.
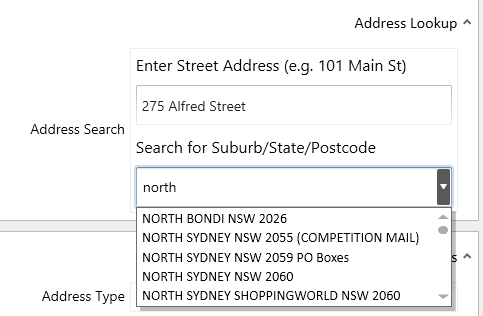
| The Country field is controlled by a lookup value Default Country under the Contact folder |
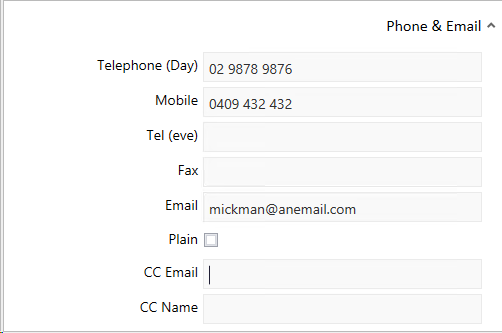
10.Enter Telephone numbers starting with the area code. thankQ will automatically separate the numbers. 1300 and 1800 numbers etc will also separate according to masking rules.
If entering an international number start with a + e.g. +61
 |
11.Enter any E-mails
 |
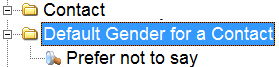
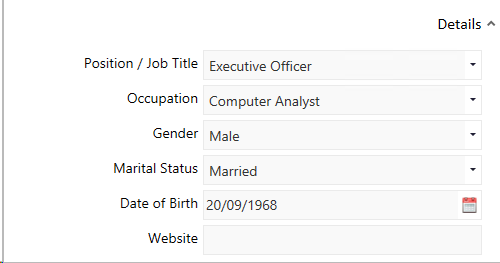
12.Select Position, Occupation, Gender, Marital Status, Date of Birth from drop downs if known.
| thankQ will populate the Gender if it recognises the Title as being Female or Male (for example Mrs, Ms, Mr). Likewise you may also set set a Default Gender in Lookup Values, which will be set in the absence of a gender specific title (or when no title is set). |
 |
 |
13.Salutations will automatically be populated from the default setup in lookup values. These can be overwritten if required.
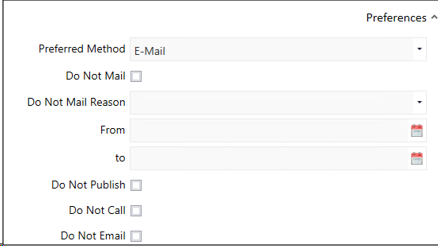
14.Enter any Preferences eg Preferred Method – how this contact prefers to be contacted by you
15.Tick beside Do Not Mail, Publish, Call or Email if relevant
| Note: Do Not Mail is essentially Do not send any letters or emails |
 |
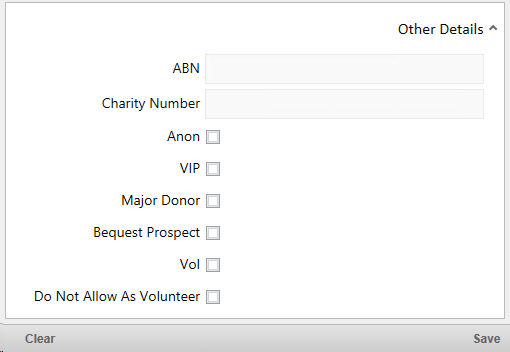
16.Enter Primary Category
Primary Categories Primary Categories help identify the different types of contacts in thankQ. Every contact must have a Primary Category. Only one Primary Category can be assigned to a contact. Examples of Primary Categories include Supporter, Member, Volunteer, Business, School or Church. Your thankQ Administrator can create further Primary Categories to suit the needs of your organisation. When a contact is created, a default Primary Category will be entered automatically. To change this, click on the Primary Category drop down arrow and choose a different value from the list. |
17.Source – how this contact came to be on your system
 |
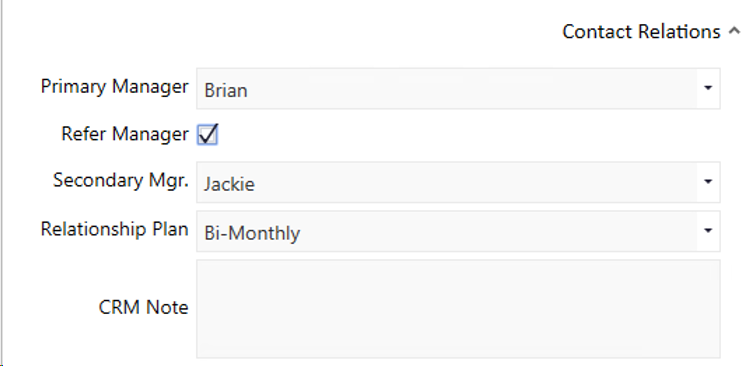
18.Select a Primary Manager if a person in your organisation is the main contact for this Contact
 |
The Electoral Division information will only populate if the system has been set to do this. If this setting is not turned on the information can be selected manually if required.
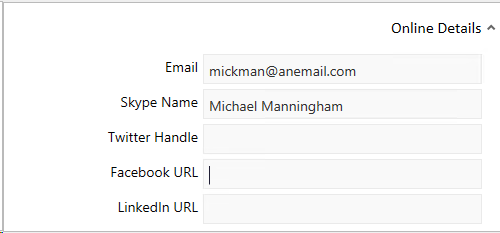
19.Enter any online details such as Skype, Twitter, Facebook and LinkedIn. If you have Skype on your computer and click on the link on the contact form Skype will open to that person.
 |
20.Continue through the form and enter any known information
21.If this contact is a Volunteer, Major Donor tick the relevant boxes
22.Click Save at the bottom
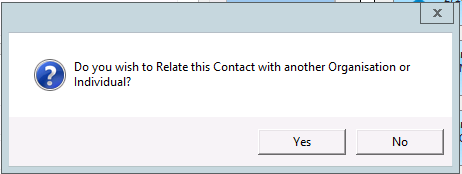
If this contact has a relationship or association with another contact on the database you can relate them now or if you are not sure you can relate them once they are on the database.
23.Click Yes
24.Select a contact from the list (we will cover searching later in the training), click OK

25.Click Yes to confirm
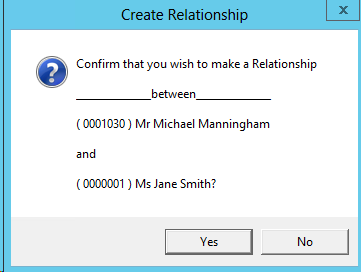
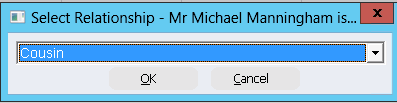
26.Select Cousin from the drop down. Make sure you read the Relationship message.
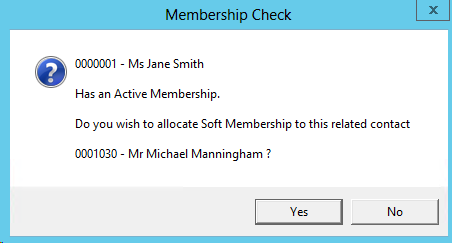
27.If a message appears similar to below click No if you do not want these details to appear on the new contacts record
The Contact record is created and their information viewable under a tab with their name, at the top of the screen. Tabs can be closed by clicking the x on the relevant tab.